When multiple texts or lengthy sentences are inputted in a cell or an entire column, these texts are seen to an extent, the remaining texts are clipped out and hidden and you want the texts seen without scrolling or scanning through the next column.
This can be done using the text wrapping feature on Google Sheets. In this tutorial, we are going to discuss how to wrap text in cells with five different methods.
What is Text Wrapping?
Text wrapping is a feature used to break long sentences into lines when the end of the page or sheet is reached. This tool is mostly employed in word document applications such as Google Docs and Microsoft Word.
It helps to wrap text around pictures and diagrams inserted into the document. In Google sheets, when the boundary of the cell is reached, it moves the following words to the next line in the same cell.
Text wrapping is classified into three types.
- Overflow
- Wrap
- Clip
Overflow: This is the default wrapping that occurs when the texts or sentences inputted spread into the next cell or cells as long as they are empty.
Clip: This prevents the text from overflowing. The text is fitted into the cell but the texts are not completely shown. The texts are completely seen when the cell is in edit mode.
Wrap: This wrapping method shows the entire content of the cell. When used, the lengthy sentences are fitted into the cell without the column being resized.
In this tutorial, we are going to majorly discuss this type of text wrapping, how it works and how it affects texts in a worksheet. The wrapped text is done in four major methods in Google sheets.
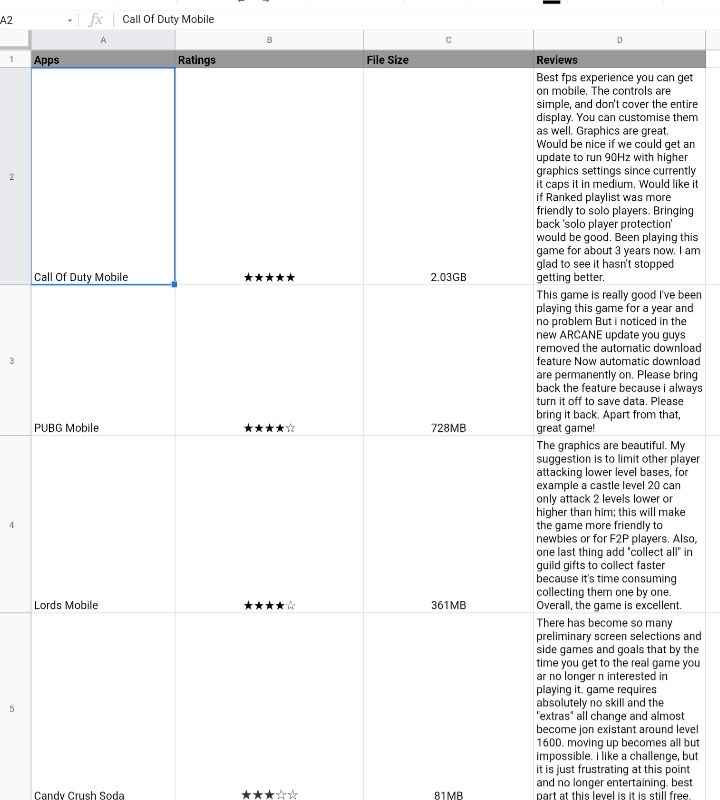
Using the sample worksheet below, with different apps, their ratings, data size and reviews by various users.
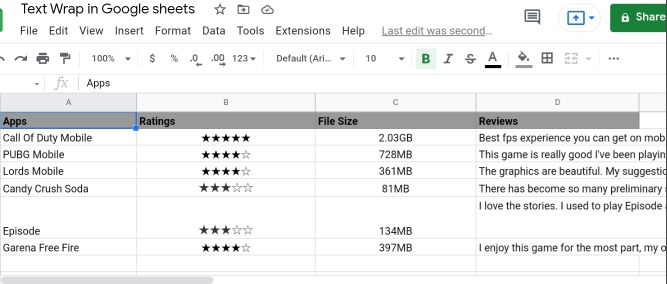
Currently, the reviews are overflowing out of the cell, so we have to wrap them up in their cells.
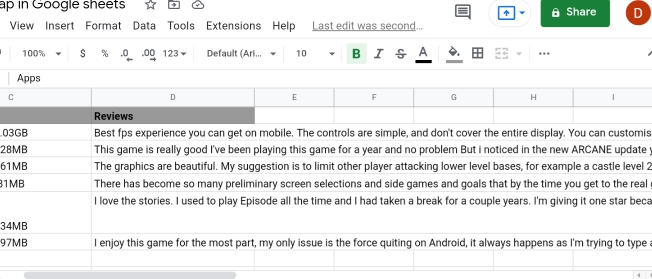
Method 1: Wrap Text on Google Sheets via Toolbar.
This is a very quick and efficient method of adding wrap texts to the worksheet.
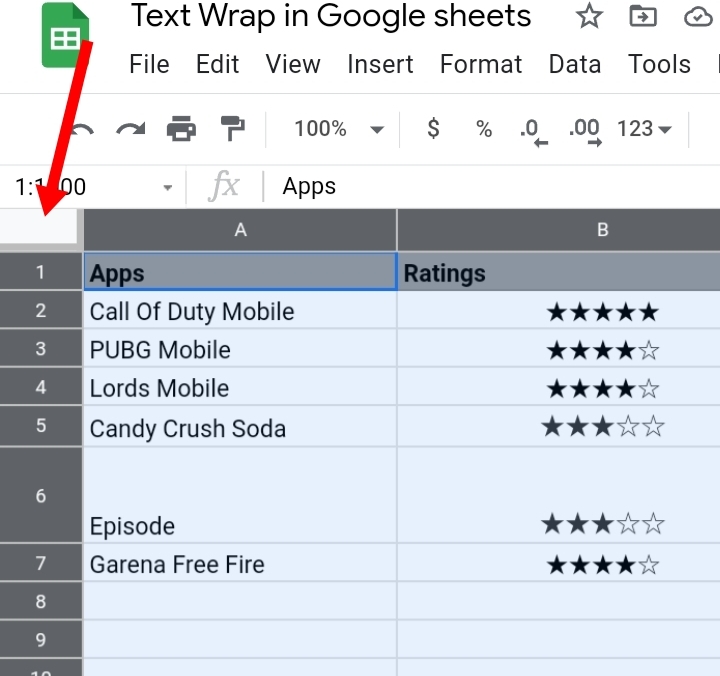
Step 1: Select the gray box on the top left corner of the worksheet. This selects all cells on the worksheet. This is used when wrapping large data sets. Alternatively, you can select the cell, range of cells, or column you want to work with.
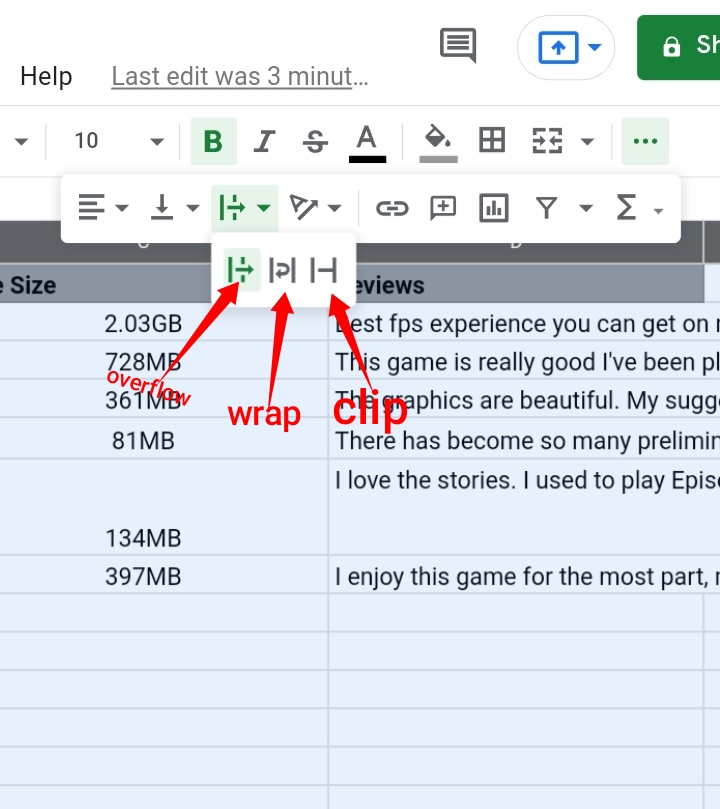
Step 2: Go to the top right of the toolbar here. Several icons that serve as shortcuts to the main tools are placed here.
Step 3: Click on the drop-down arrow close to the Text Wrapping icon here.

Step 4: Three more icons are displayed. Each icon represents the overflow, wrap, and clip wrapping types respectively. Select the wrap text icon.
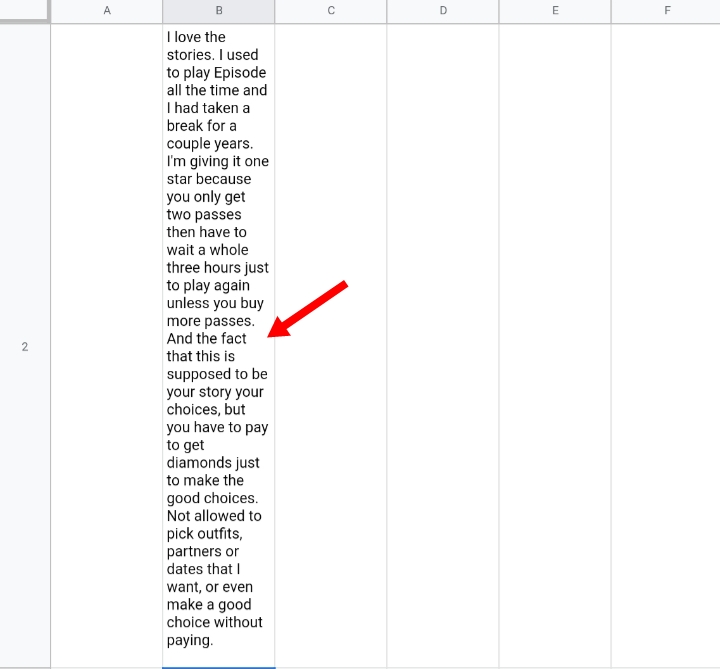
Step 5: The long texts and sentences are fitted into their respective cells without having to increase the column’s size.
Method 2: Wrap Texts on Google Sheets via the Format tab.
Step 1: Select the gray box on the top left corner of the worksheet or the column containing the extended texts.
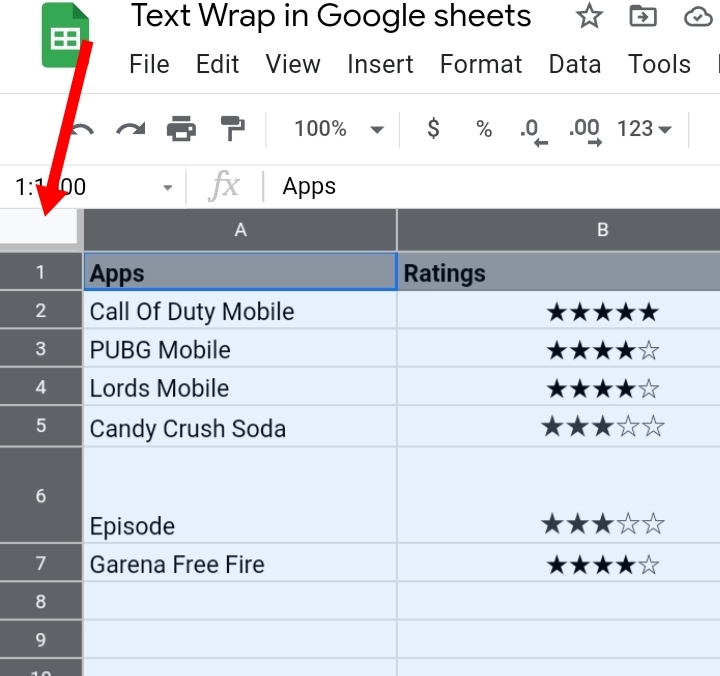
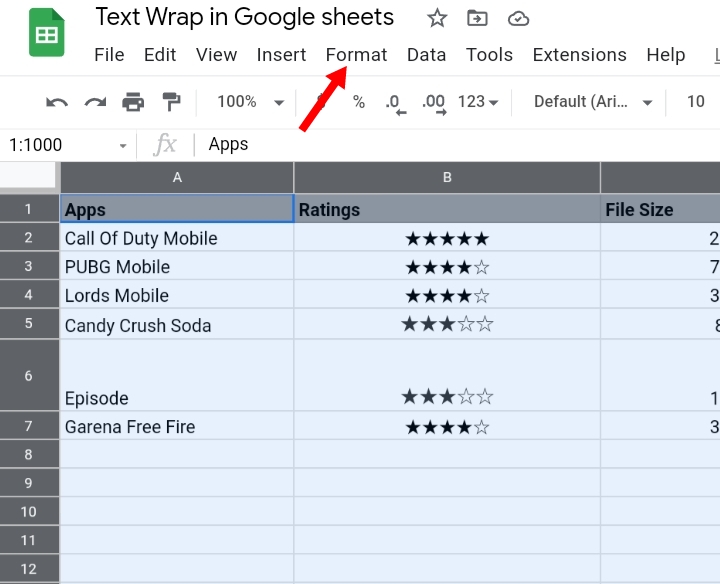
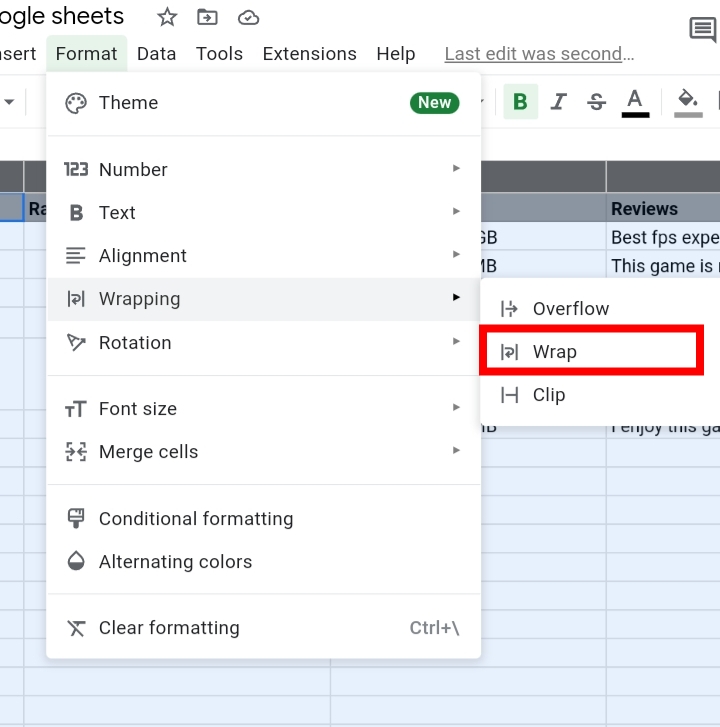
Step 2: Click on Format on the toolbar.
Step 3: Select Wrapping from the drop-down menu.
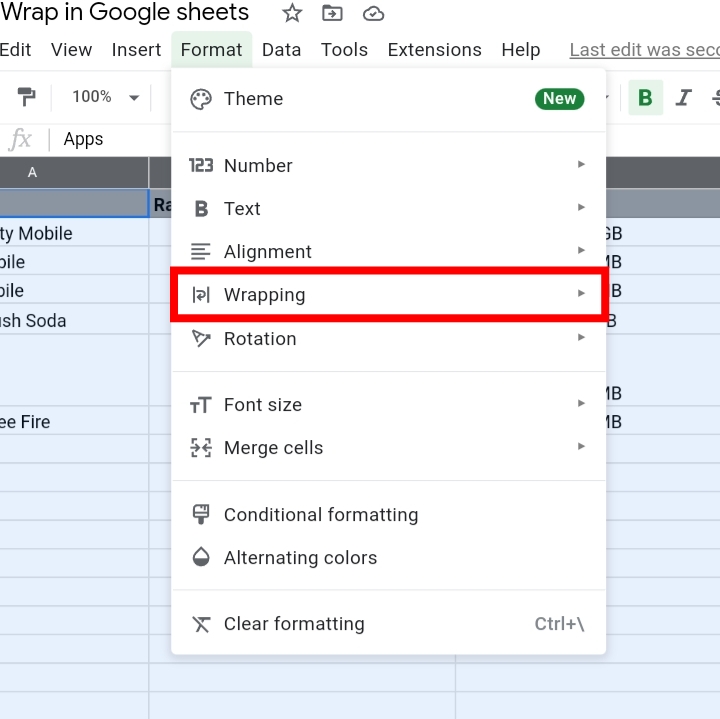
Step 4: The three types of text wrapping are stated here. Click on Wrap.
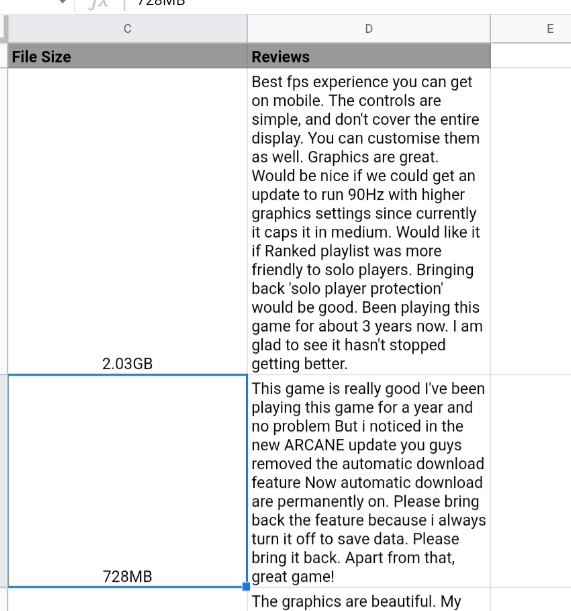
Step 5: The selected cell texts are wrapped in the cell without crossing the boundaries of the cell.
Method 3: Wrap Texts through the Google Sheets Mobile App.
Google has developed an additional means of accessing and creating your worksheets whenever and wherever you are. The Google Sheets mobile app doesn’t require a desktop as it can be operated on your Android and IOS devices.
This app is most suitable for beginners and learners as the tools are simply explained. It also benefits users who love to work smartly on the go. Text wrapping can also be done via the mobile app.
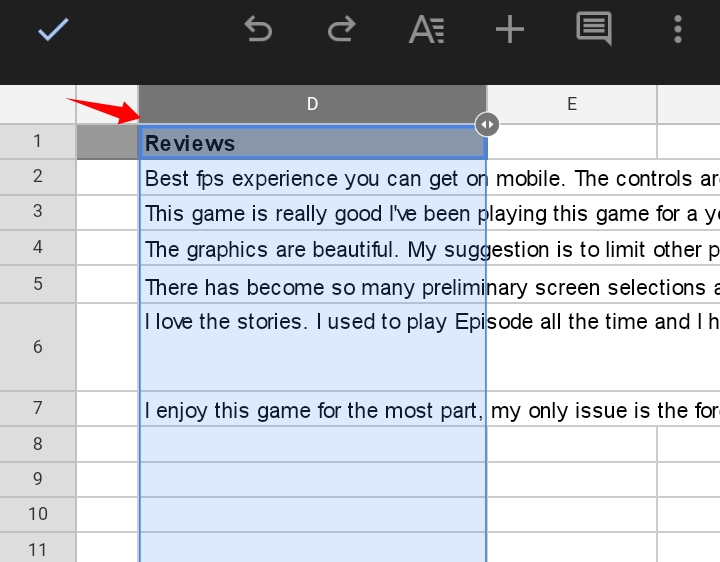
Step 1: Select the cell or column in which you want to be wrapped or the gray box by the top left to select all cells and columns in the worksheet.
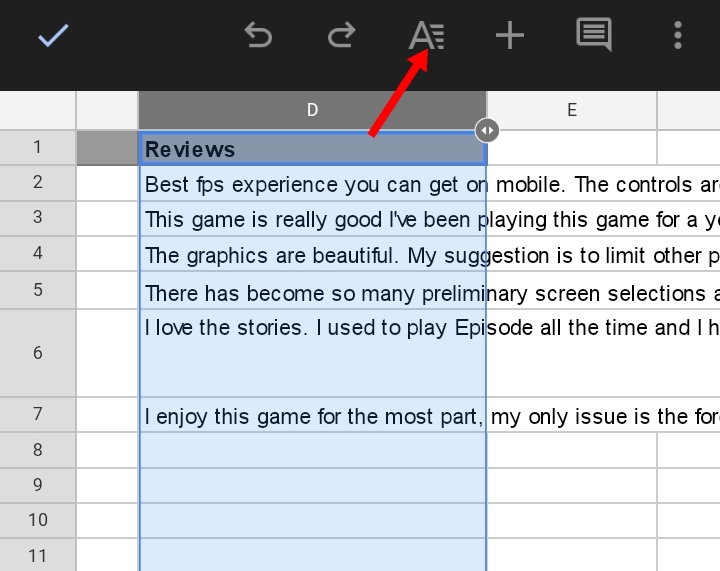
Step 2: On the toolbar at top of the screen, click on the Format icon. It is denoted as a capital letter, A, with three short dashes beside it.
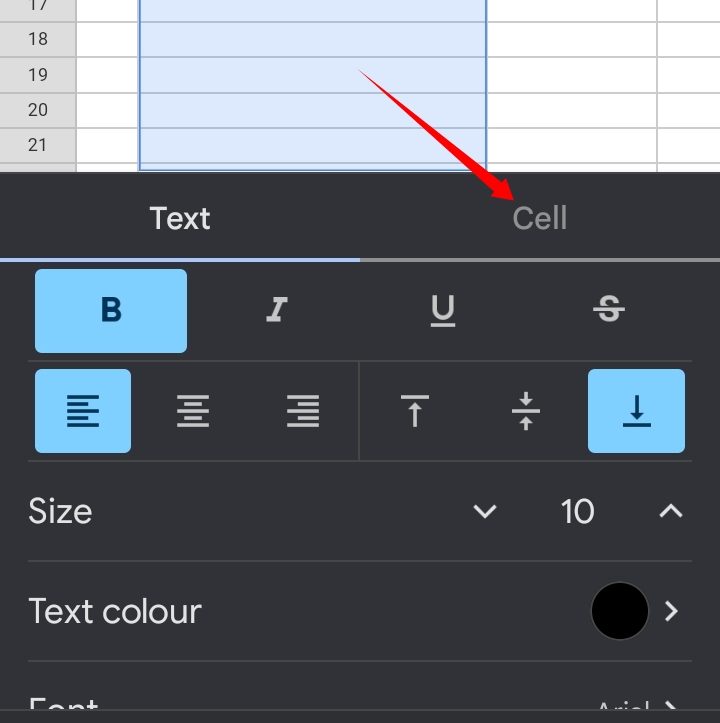
Step 3: A tab is opened below. It is categorized into two groups which are Text and Cell. Click on Cell.
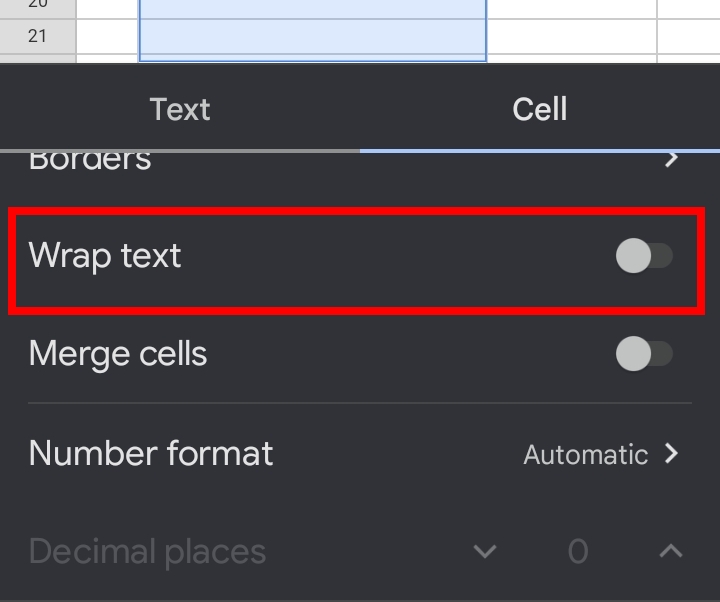
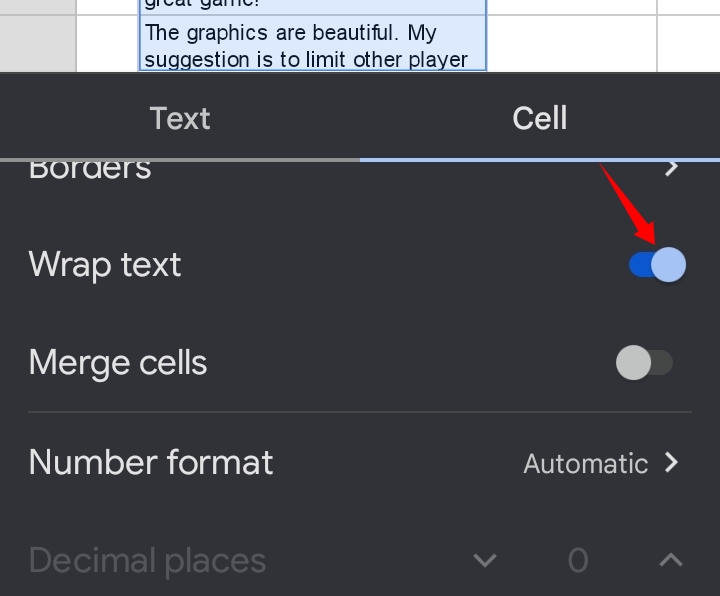
Step 4: Scroll down and select the text wrap option by clicking on the On/Off button there.
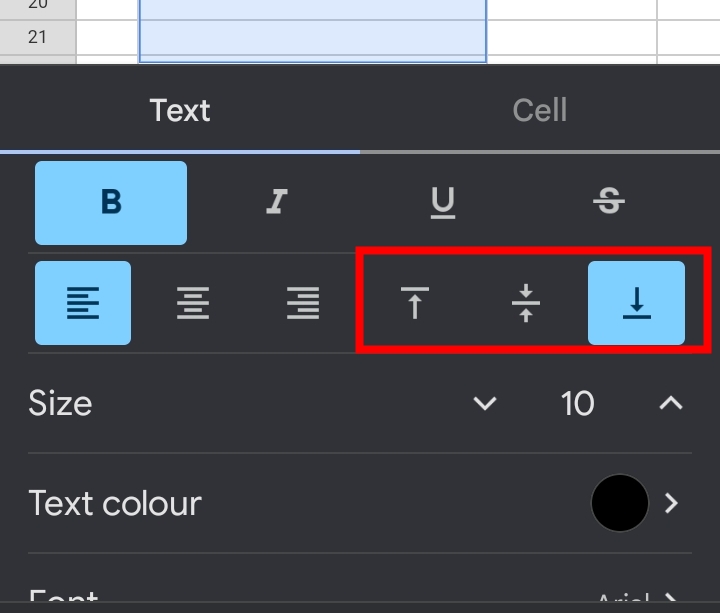
Step 5: You can also change the alignment and position of the text in the cell from the Text tab here.
The selected texts in the column are wrapped in their rows.
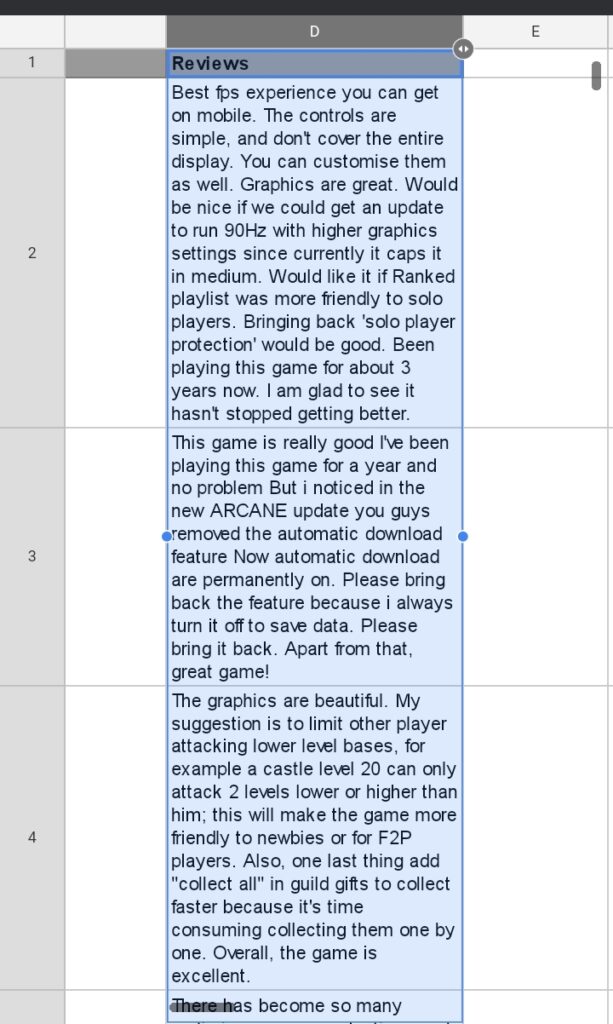
Method 4: How to Text Wrap in Google Sheets via Shortcuts.
Users who operate on their computers and laptops would find this method handy. Unfortunately, there is no shortcut for users with devices with the Mac OS but it can be enabled through the help icon on the toolbar.
Step 1: Click on Help on the toolbar.
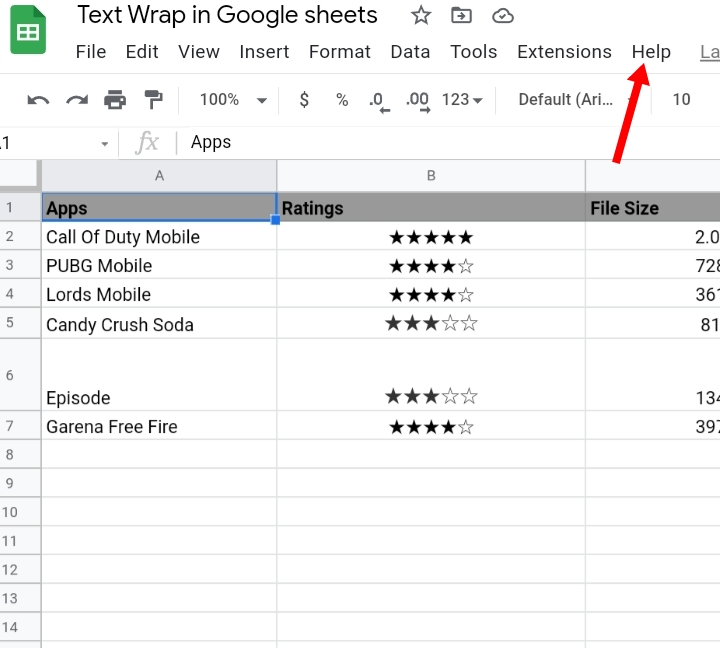
Step 2: From the drop-down menu select keyboard shortcuts.
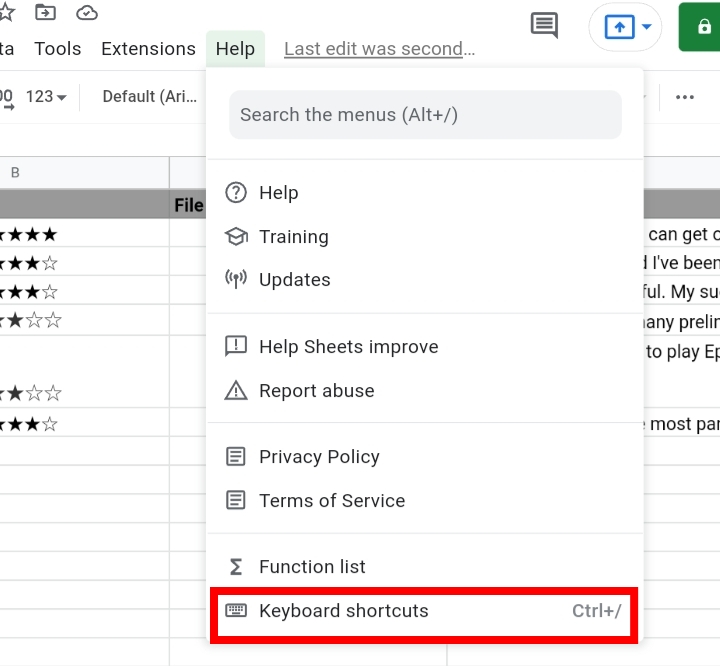
Step 3: A pop-up is displayed on the worksheet. Scroll through the list of shortcuts. The Wrap text shortcut is denoted as Alt key + O + W + W.
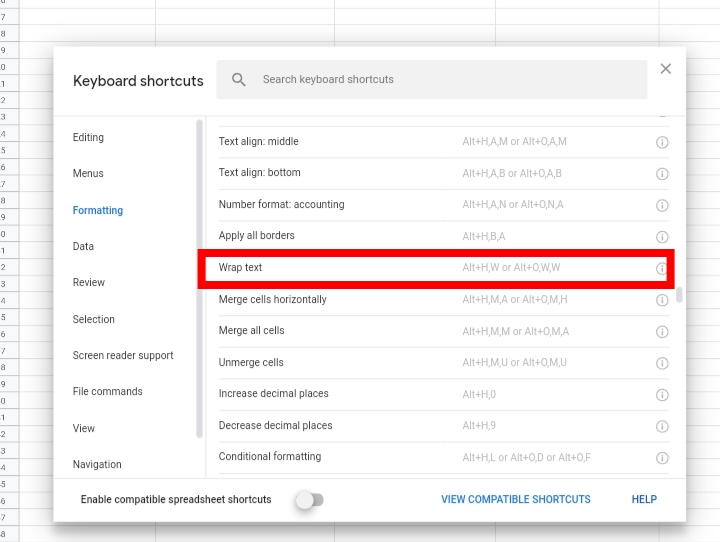
Step 4: To permit the shortcut, click on Enable Compatible Spreadsheet Shortcuts.
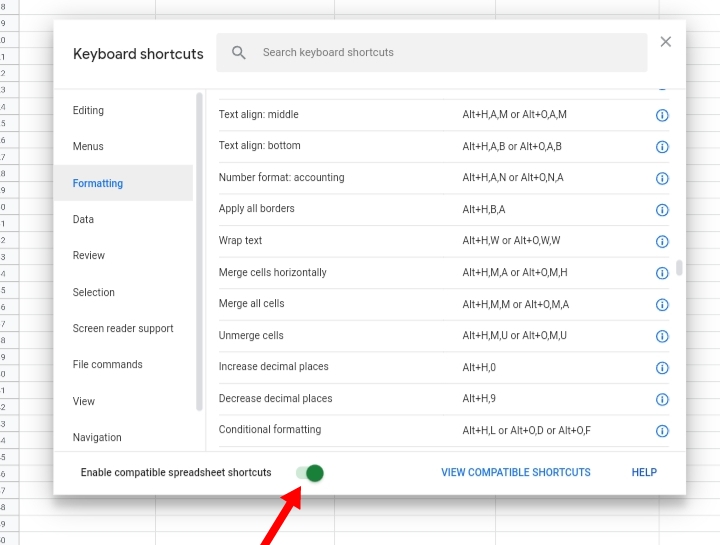
Also, the Overflow shortcut is denoted as Alt key + O + W + W, while the Clip shortcut is Alt key + O + W + C.
The above shortcuts can be used by both users with Mac OS and Windows OS.
Method 5: Manually Wrap Text on Google Sheets.
Text wrapping can also be done manually by inserting line breaks in between the sentences of the text.
Step 1: Double click the cell or press F2 on the keyboard to edit the selected cell.
Step 2: Place your cursor where you want the line break inserted.
Step 3: Press the Ctrl key + Enter or Alt key + Enter, that’s if you’re using a computer with the Windows OS. The Ctrl key + Return or Alt key + Return applies to Mac OS devices.
Step 4: The line break is inserted in the cell. You can repeat the steps as much as possible to insert multiple line breaks in the Google Sheet.
Note that with any method used, the whole width of the entire row increases in the column regardless of other cells below. Also, the wrap won’t work if the column is wider than the text.
Frequently Asked Questions about Wrap Text in Google Sheets.
Question 1: What is the Shortcut for Wrap Text In Google Sheets?
The shortcuts are the Alt key + O + W + W and the Ctrl key + Enter.
Question 2: Why is text not wrapping Google sheets?
The text wrapping is not automatic but can only be applied but it can be used at the start of the worksheet. For example, you have a dataset with multiple lengthy texts that need to be inputted. You can wrap your empty worksheet so that any text inputted, automatically gets wrapped in the cell.
Step 1: Select the gray box on the top left of the cell. This selects all empty rows and columns in the worksheet.
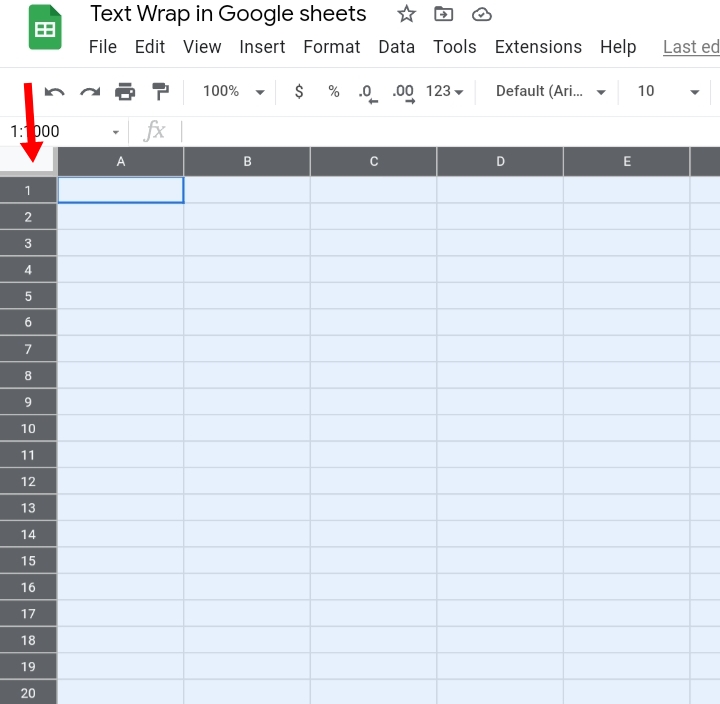
Step 2: Using either the Format method or via the toolbar, apply the Wrap text format into the cell.
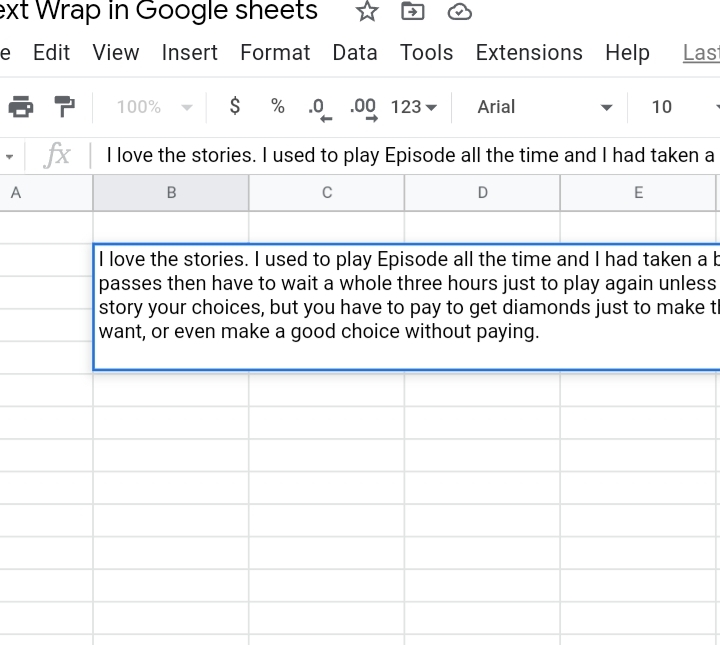
Step 3: Any lengthy text entered automatically gets wrapped into the cell.
Question 3: Why is Text Wrapping useful?
Text wrapping aids visibility and reading flow when you have extended paragraphs inputted in a row as the cells tend to become wider in size. It also helps to keep track of words typed in a cell without losing sight of the phrases inputted.
Final Thoughts
With the detailed methods and steps, I hope you found this guide informative. If you have a favorite method or know any other method that can be used, let us know in the comment section. Thanks for reading.


