Images are a great way to convey information and help readers understand how your content is structured. But do you know how to overlap images in google docs? No matter what the answer is. We will provide a step-by-step guide so that you can do it quickly.
So today, we will walk you through how to overlap images in google docs with step-by-step instructions and screenshots so that you can get started right away! We also include a video guide so that you can understand this more clearly.
We share two different methods. In the second method, you can overlap images with words in google docs. You can use any of these methods to overlap images. So let’s go to know how to overlap images in google docs.
Method 1: Overlap Images In Google Docs Using Wrap Text
In the first method, we will show step-by-step how to overlap two images in google docs using warp text. You need to follow the below steps to do that. So, let’s go:
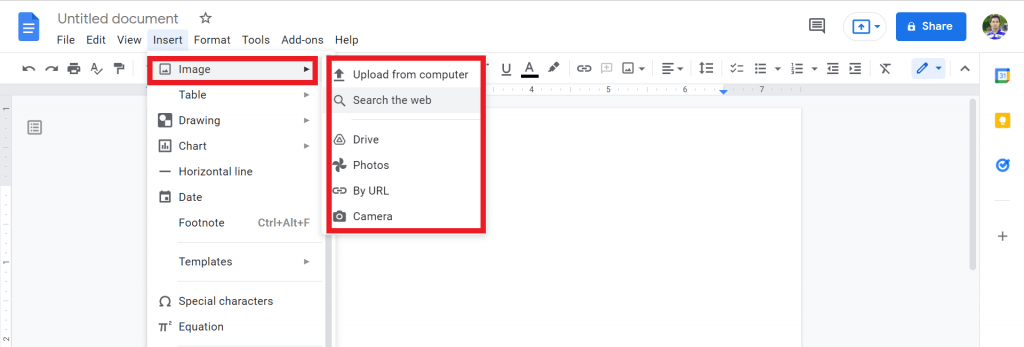
1. Open Google Docs and click on the Insert from the top menu bar.

2. Tap on the Image option and select the option where you want to input the images.
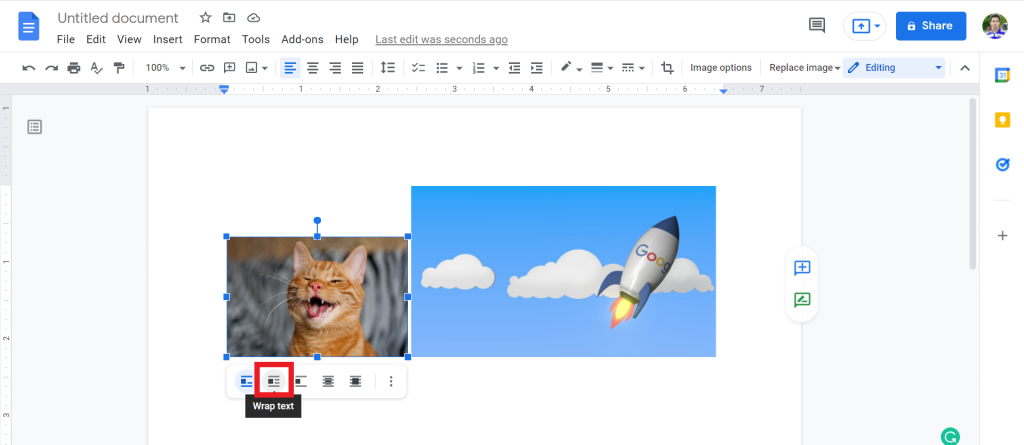
3. Now, tap on the image that you input for overlay. Select the Wrap Text option.
4. Click on the Margin option and select 0” margin. In the same way, you have to make a 0” margin in your second image.

5. Now, drag the first image at the top of the second image. Now, you will successfully overlap two images in google docs using warp text.

Please watch the below video to understand every process. We discuss two methods practically in this video.
Check out How To Do Endnotes In Google Docs.
Method 2: Make Images Overlap In Google Docs Using Drawing Tools
Now, I will show how you can make images overlap in google docs using drawing tools. In this process, you can also know how to put a text box over a picture in google docs. So, let’s go to know how you can do that.
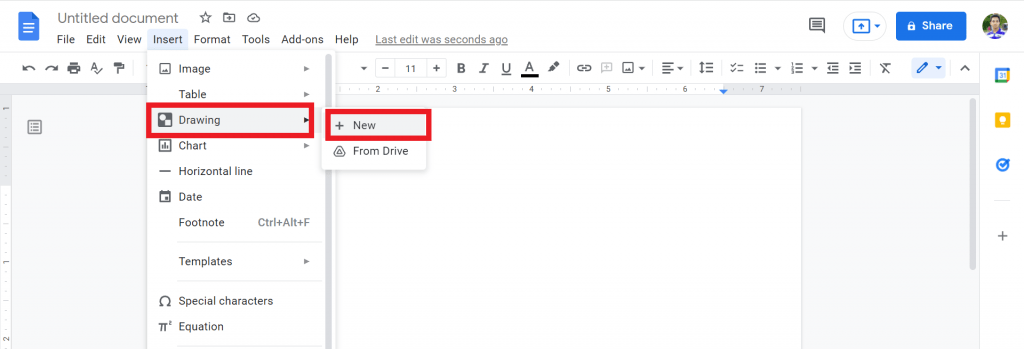
1. Open Google Docs. Next, tap on the Insert Option.

2. Click on the Drawing > New.
3. Now, you have to add a background image. For that, tap on the image icon and upload the photo from your computer. You can also use google drive for images.

4. To overlay images with text, select the Text Box. Then, right-click on the image and adjust the text box accordingly to your need.
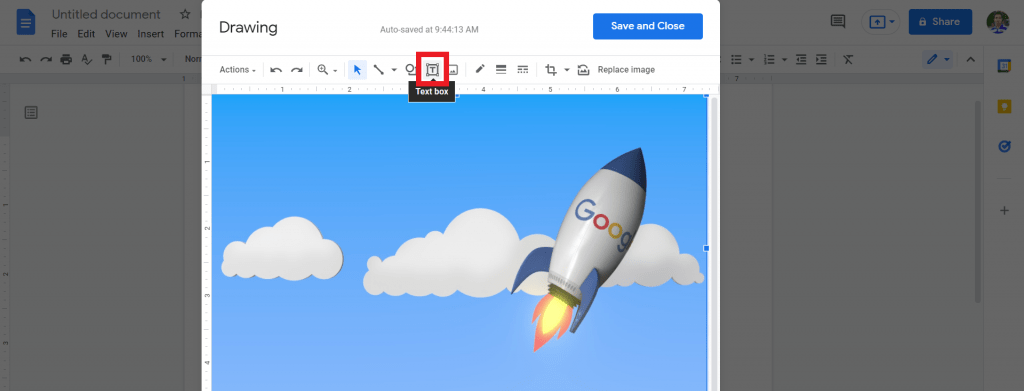
5. Now, add the text that you want. You can also add the background color using the color option.
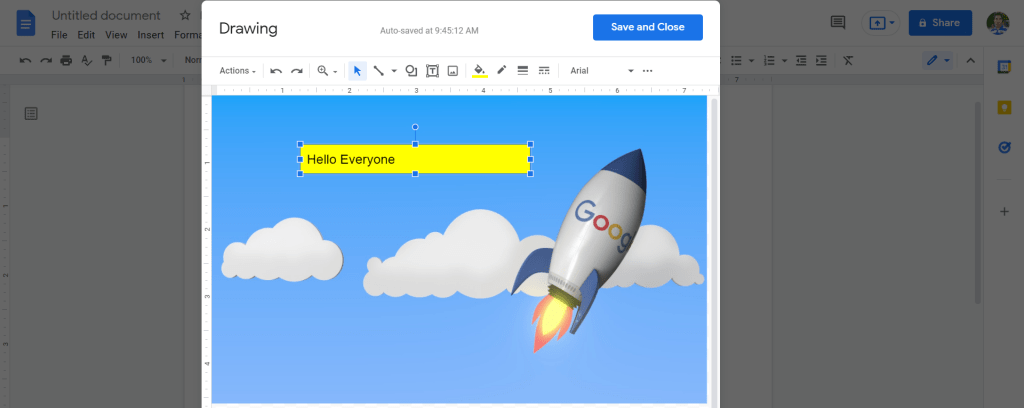
6. To add an image as an overlay, tap on the image icon and select the image that you want. Next, adjust the image according to your need. Finally, click on the Save and Close option.
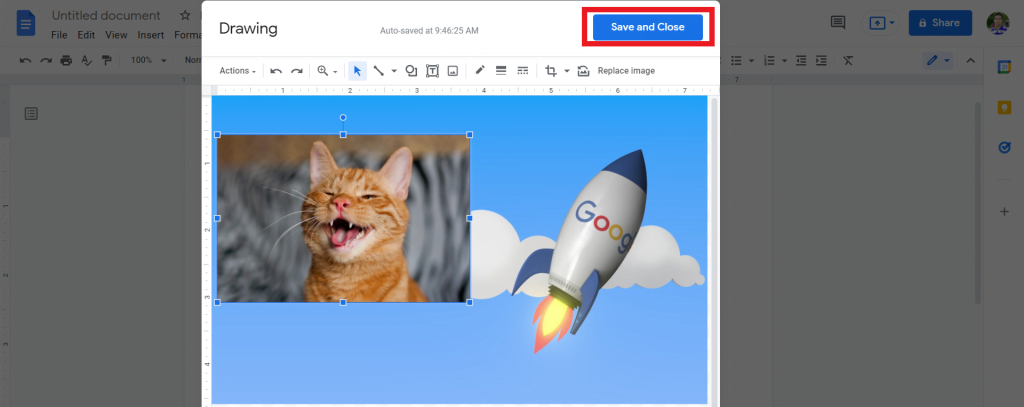
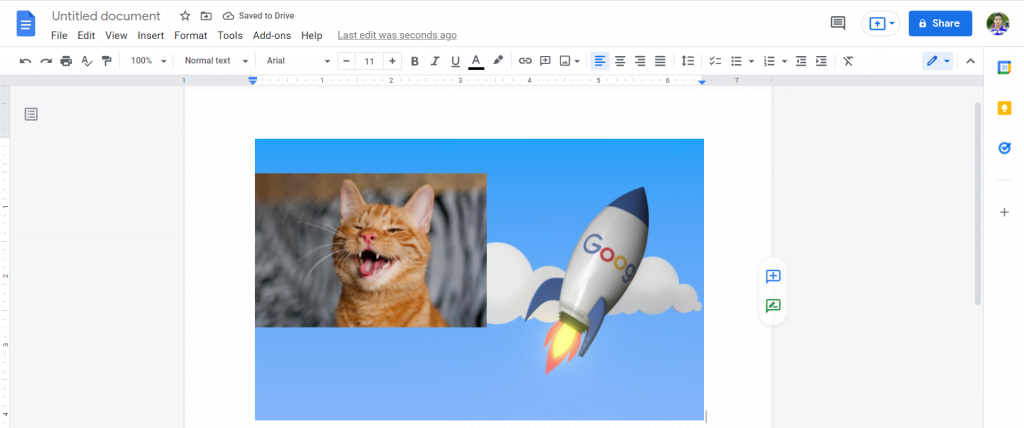
7. Now, you will successfully make images overlap in google docs using drawing tools.
Check out How to Flip Words in Google Docs.
Can you overlay text in Google Docs?
Yes, you can overlay text in google docs. I have already discussed the whole thing above in this article. You need to follow method two to do that.
check out How To Add Roman Numerals In Google Docs.
Final Thoughts
Now, you can easily put images or text on top of another Image in Google Docs by following the step-by-step guide. You can also watch the above video so that you can understand every single process.
We’re always happy to answer any questions or hear feedback on our blog posts. So, feel free to comment below or contact us anytime!
If you find it helpful, please share this article. Thanks for reading the quick step-by-step guide. Have a great day.


