Sometimes you will need to be able to modify row height in Google Sheets so that you can have bigger cells in your spreadsheet and include more data.
You may want to increase or decrease the height of your rows.
In this tutorial, we’ll learn how to change the height and size of rows.
How to Change Row Height Using a Mouse Click and Drag?
This is the simplest and the quickest way to change the height of a single row or a group of rows.
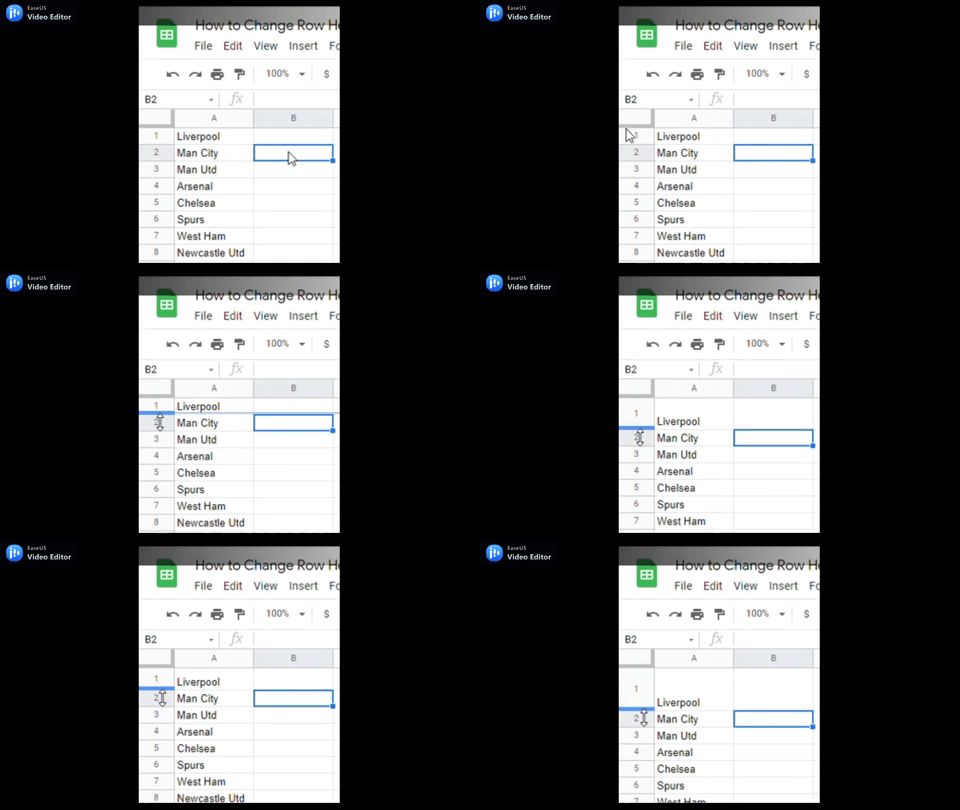
1. Place your mouse cursor on the line beneath the row number.
2. Hold on to the left button of the mouse.
3. Drag your mouse up and down to make the row smaller and larger.
4. Upon reaching the required size, release your mouse.
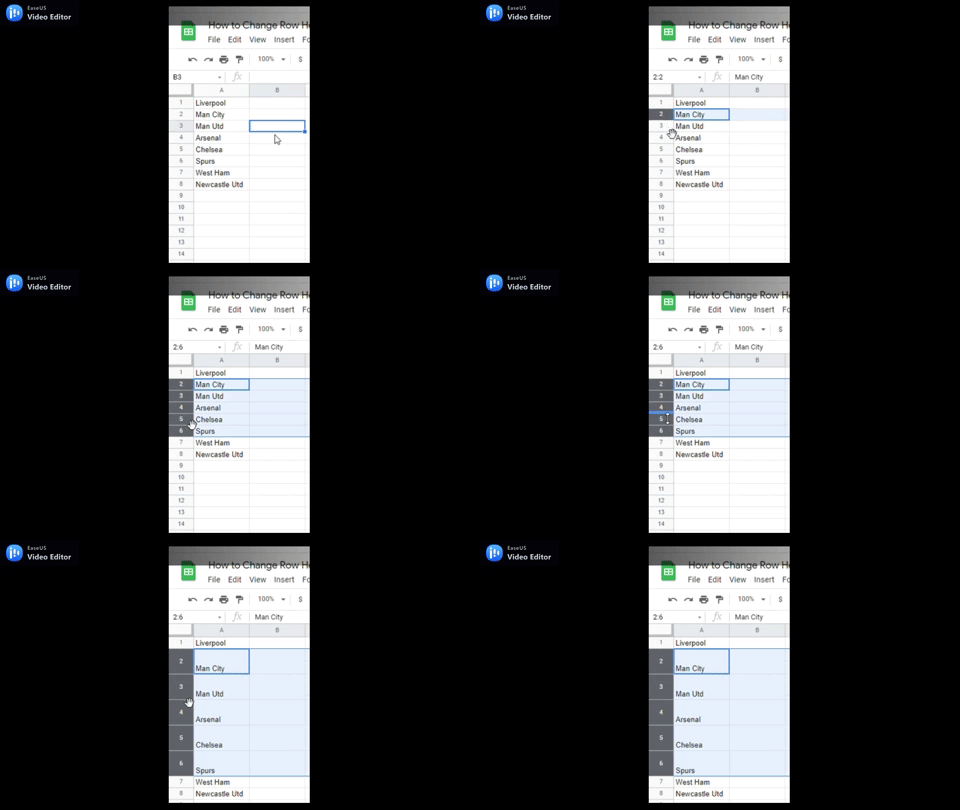
If you wish to change the height of a group of rows together, highlighted the numbers of the rows you wish to adjust their height, choose any number of the highlighted cells and do the same previous steps.
Check out How To Get Google Sheets To Stop Rounding.
Auto-fit Row Height
The most common reason for resizing the row height is when there is additional text in the cell that is not visible in the row.
When you have a lot of data to deal with, you won’t be able to do this manually as this will take a lot of time. You may use Auto-fit to speed up this process and make it more efficient.
Using Auto-fit, we’ll have larger or smaller rows that are fit enough so that all of the content is the row in seen.
We’ll show you two simple methods to use Auto-fit in Google Sheets.
Autofit using Double-Click (Shortcut)
You can Autofit the desired cells with just a mouse double-click by following these steps:
1. Highlight the rows for which you want the row height to be auto-fit.
2. Move your cursor to the bottom border of any of the rows you’ve chosen.
3. Double-click the line right below one of the rows whose height you wish to auto-fit.
4. This will automatically adjust the chosen row’s height, as seen below.
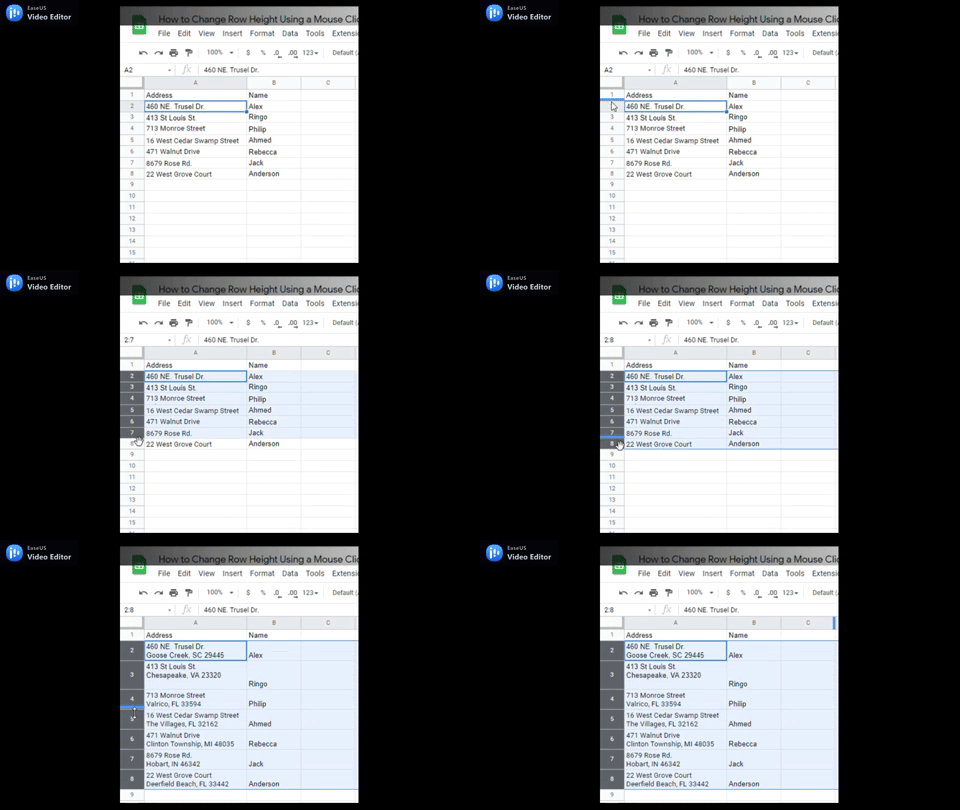
Note: This does not result in all of the rows being the same size. It adjusts the row height to accommodate the content, thus no words are hidden anymore.
Also, if there is more room and the content requires less, the row height would be reduced.
Fit to Size Using Dialog Box
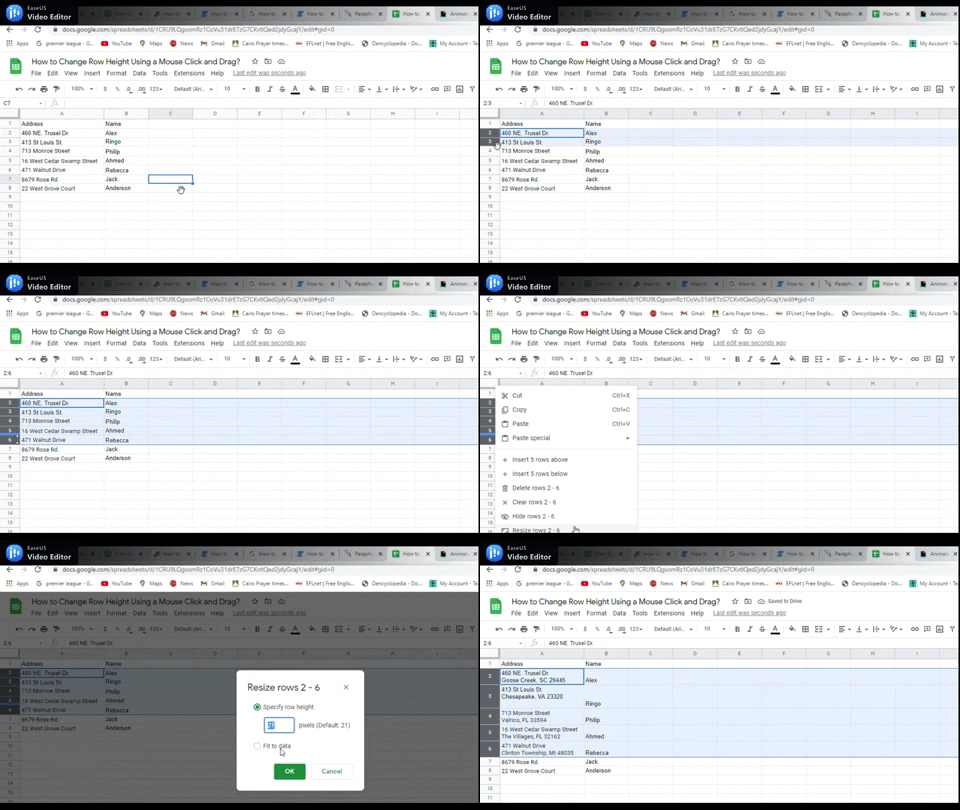
You can also auto-fit your row height by making a right-click by the mouse and using the fit to data option, through these steps:
1. Highlight the number of the rows you want to change the height of.
2. Make a right-click on the mouse.
3. Click on Resize rows.
4. Choose Fit to data.
5. Choose Ok.
6. You’ll now have the height of the rows resized according to the content in them.
Check out How To Add Or Remove Dollar Signs In Google Sheets.
How to Resize the Row by Specifying the Height?
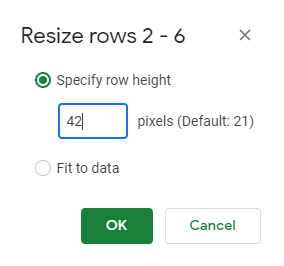
You can specify the row height by following the same steps as shown above, but instead of choosing the Fit to data option, enter the number of pixels (21 is the default value) in the Specify row height box.
How to Set Google Docs Table Row Height
When you create a new table in Google Docs, the table’s column and width sizes are set to default settings. The height of the row is usually perfect for a single line of text. However, if you wish to utilize a size other than the default, you’ll need to know how to adjust Google Docs table row height.
In the following steps, you’ll get to know how to set a Google Docs table row height in a very simple way.
1. Highlight the cells you wish to resize.
2. Make a mouse right-click on the highlighted cells.
3. Select the Table properties option.
4. Type the height you want in the Minimum row height box.
5. Click Ok.
Final Thoughts
In this Guide, we showed the simplest methods for changing the height of Google Spreadsheet’s rows.
As you get more comfortable with spreadsheets, you’ll likely run across a variety of situations where you’ll need to modify the height of the rows to accommodate more data in them.


