Cell padding means adjustment of cell size and width. In Google Sheets, there are no inbuilt features and tools to aid cell padding but there are two alternative methods to changing cell paddings on your worksheet.
Cell paddings increase concise reading flow and clarity of words. In this tutorial, we are going to learn how to Change Cell Padding in Google Sheets.
There are two known types of padding. These are Vertical padding and Horizontal padding.
How to Change Vertical Padding In Google Sheets
The vertical padding adjusts the width of the cells in each column, vertically. This is done by using the text wrapping feature in Google Sheets.
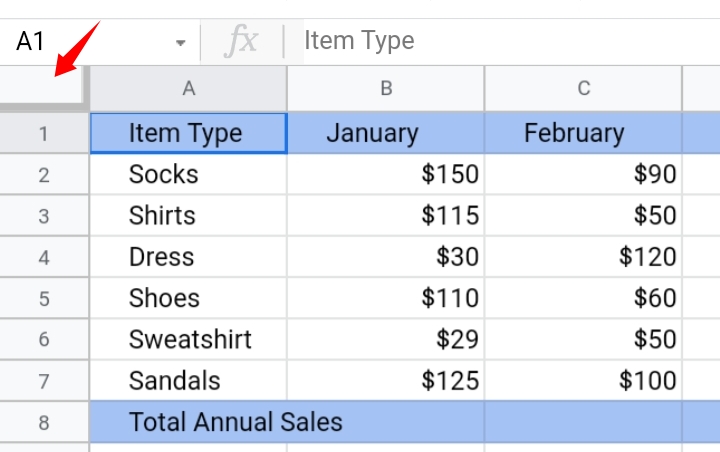
In the sample worksheet below, we have a list of items and the sales made off each item monthly. To make the vertical padding uniform, we adjust all cells in the worksheet by following the stated steps below.
Step 1: Highlight all the cells in the worksheet by clicking on the gray box at the top left of the worksheet or using the keyboard shortcut Ctrl key + A. By doing so, all changes and formats applied are made throughout the worksheet.
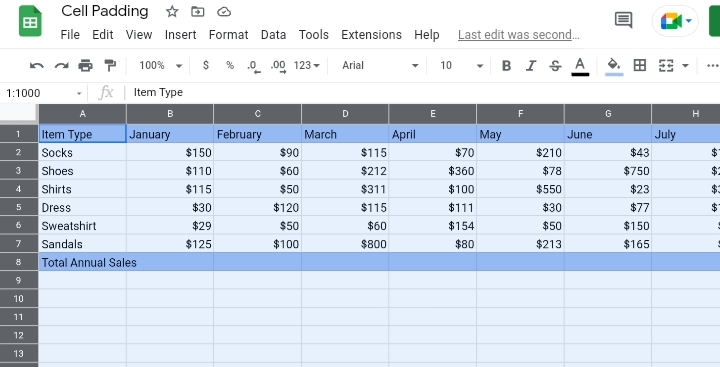
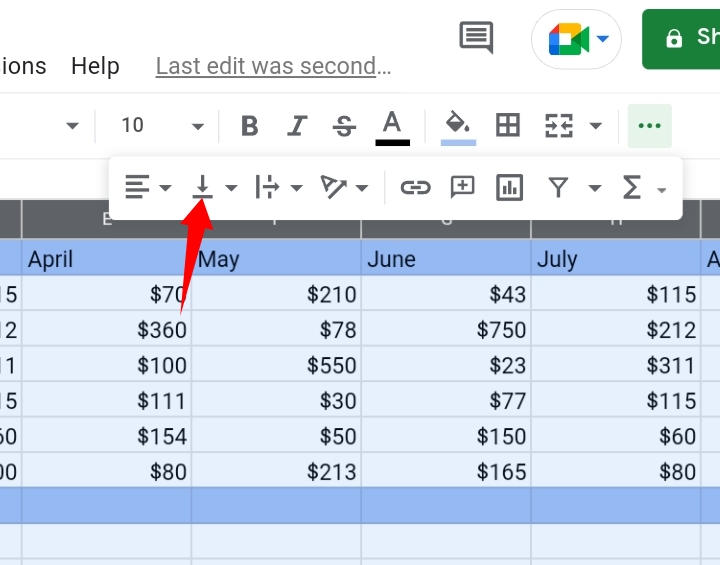
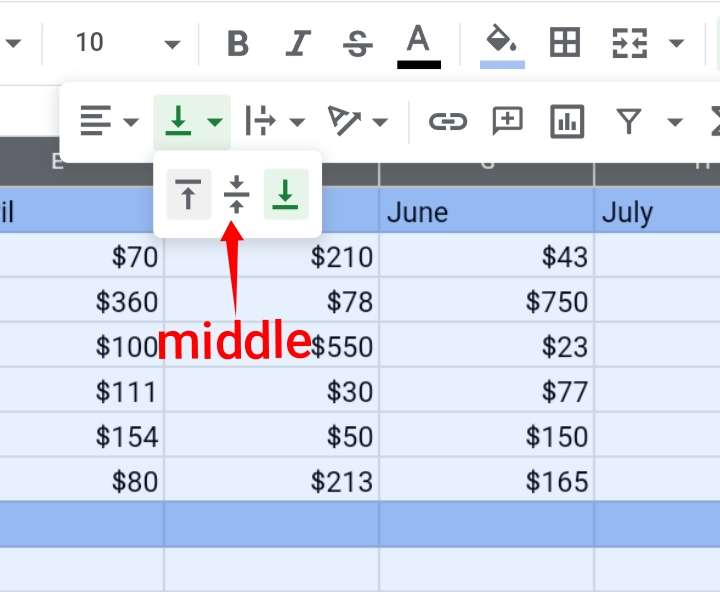
Step 2: On the far right of the toolbar, multiple icons serve as shortcuts t0 other significant tools in Google Sheets. Search and click on Vertical Alignment.
Step 3: The three icons are displayed. Each icon represents the type of alignment which are Up Alignment, Middle Alignment and Down Alignment.
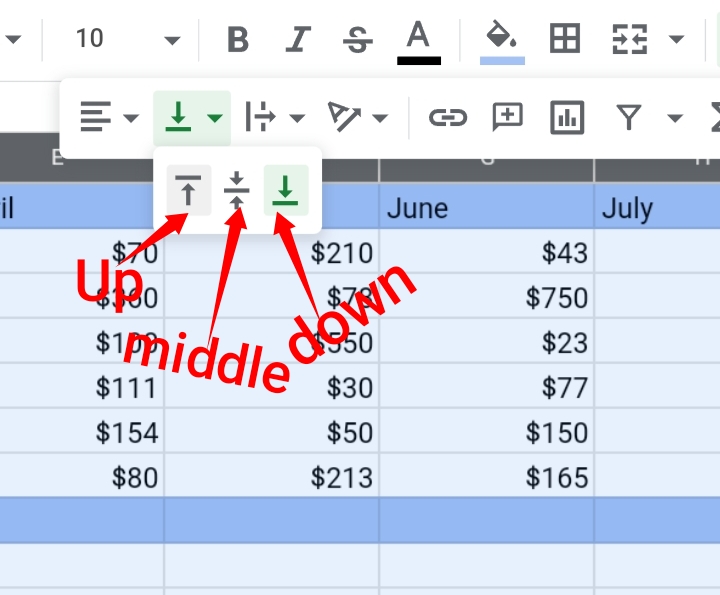
Step 4: Click on Middle Alignment. All texts in the cells are shifted to the middle of the cells.
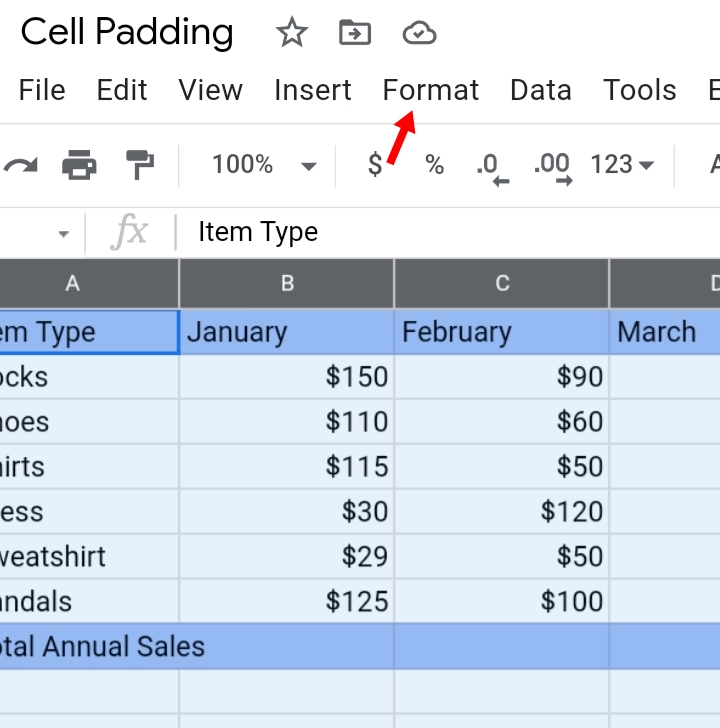
Step 5: Click on Format on the toolbar.
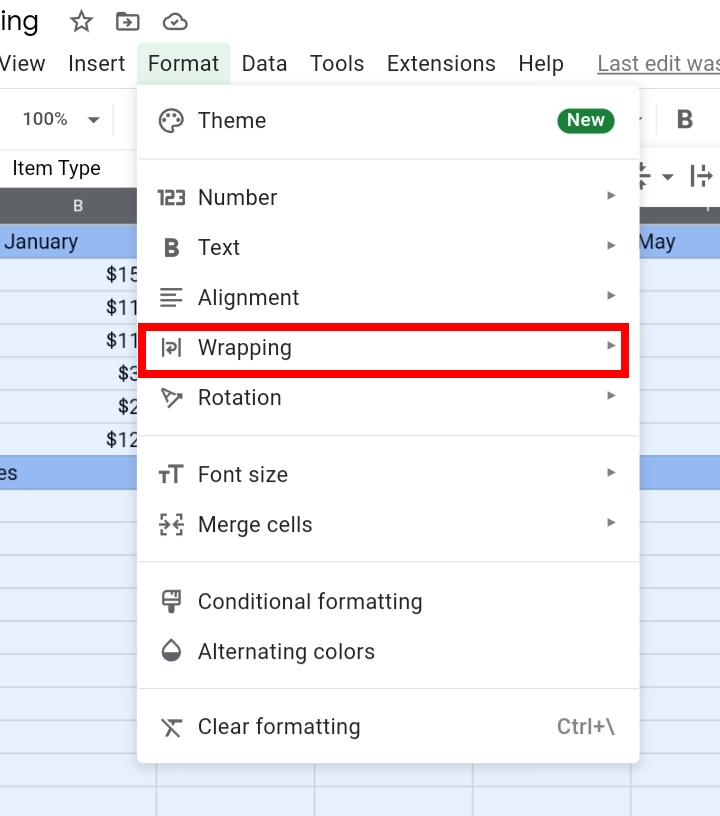
Step 6: From the drop-down menu, select Text Wrapping.
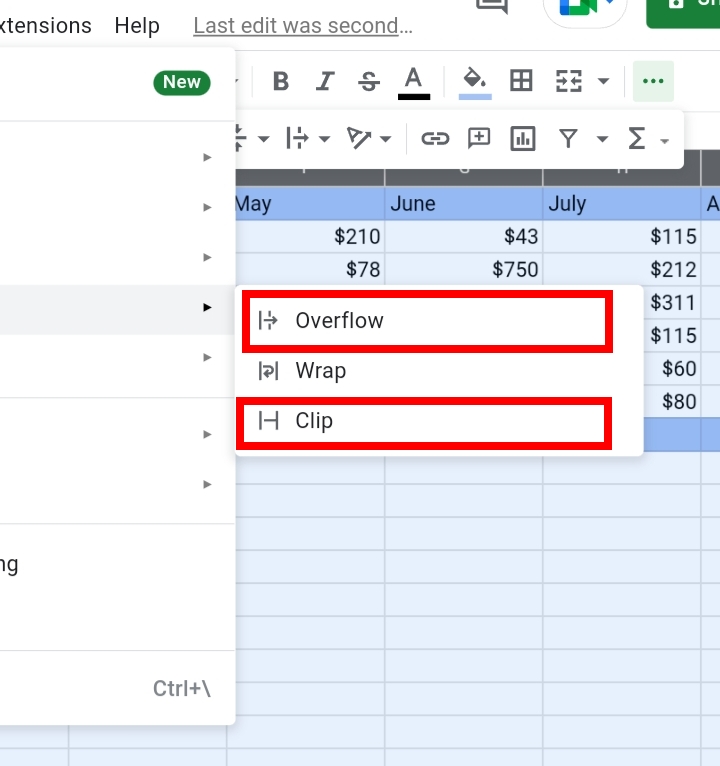
Step 7: Select either Overflow or Clip wrapping styles. Do not select Wrap because It reduces the column size to fit in accordance with the content of the cell.
Step 8: Now you can adjust the height of the cell by dragging the line below the row number. To increase the cell height, you drag the line lower and to decrease the cell height, you drag the line higher above the original height.
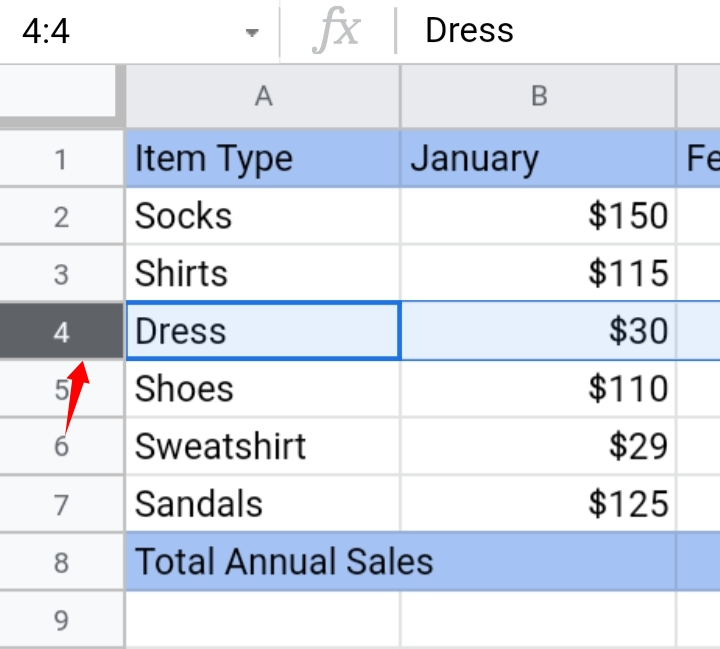
We’ve successfully changed the vertical padding easily.
How To Change the Horizontal Padding In Google Sheets
Using the worksheet used above, we want to adjust the length of the rows.
Step 1: Highlight all the cells in the worksheet by clicking on the gray box at the top left of the worksheet or using the keyboard shortcut Ctrl key + A. By doing so, all changes and formats applied are made throughout the worksheet.
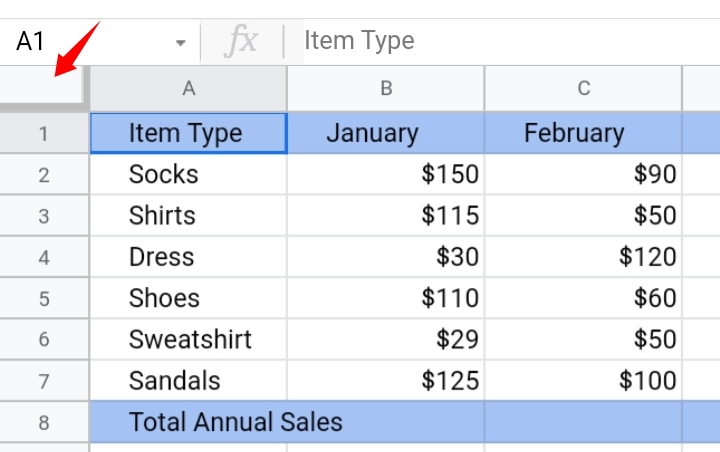
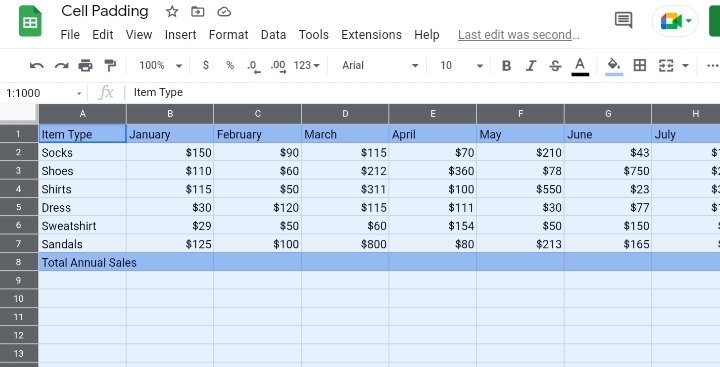
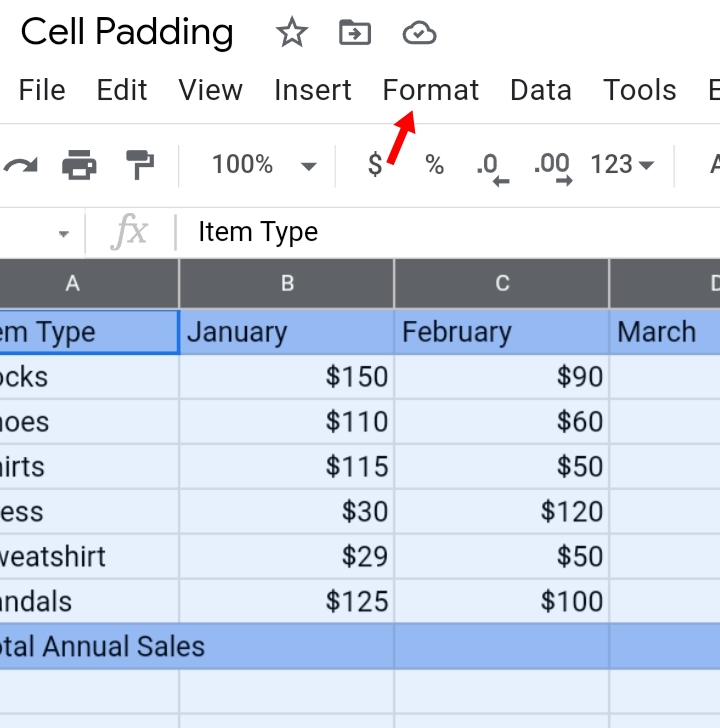
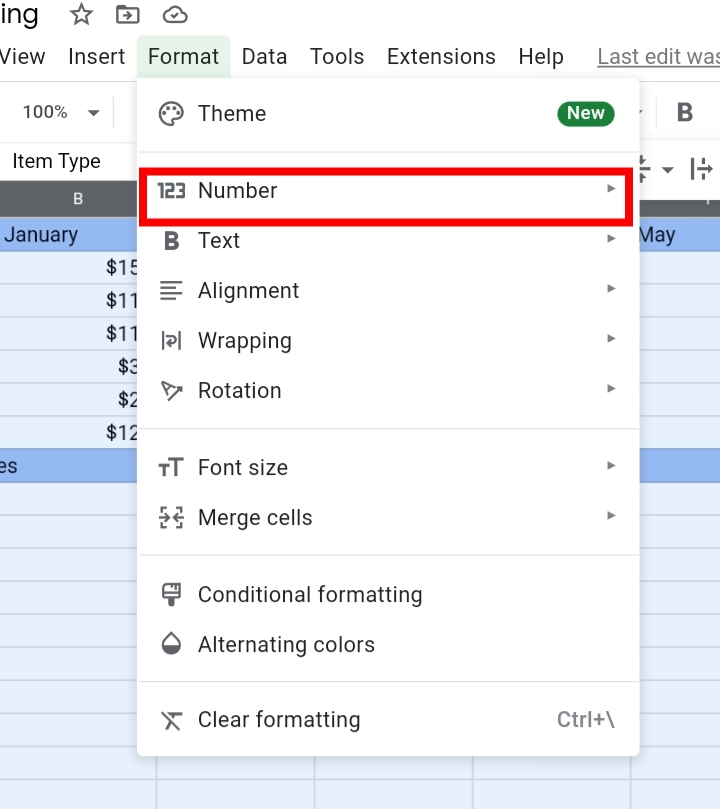
Step 2: Select the Format tool on the toolbar.
Step 3: From the drop-down list, select Number.
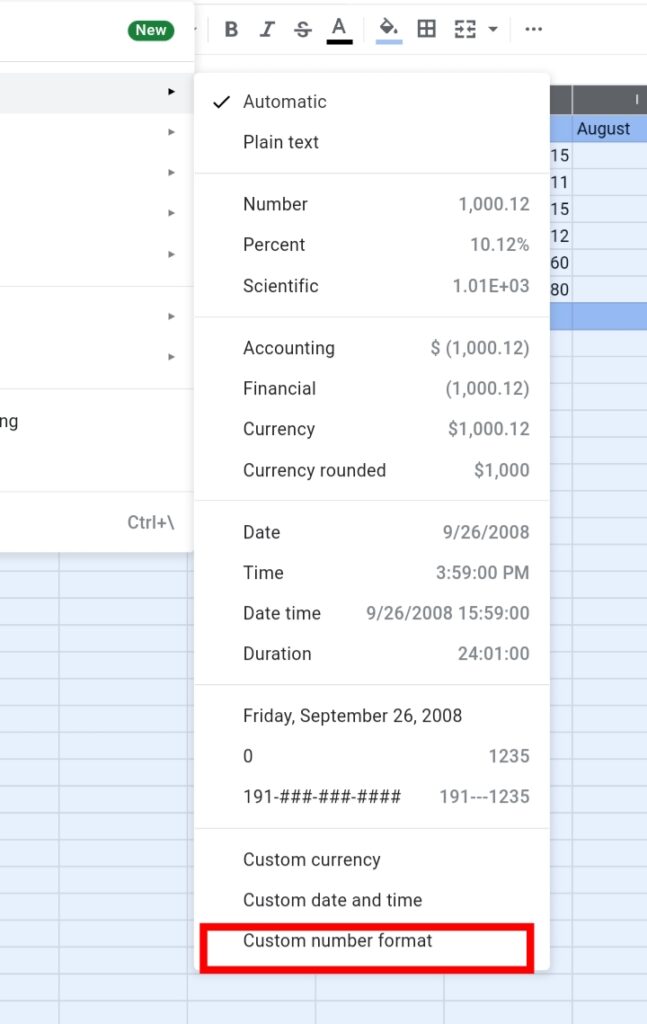
Step 4: Select Custom Number Format.
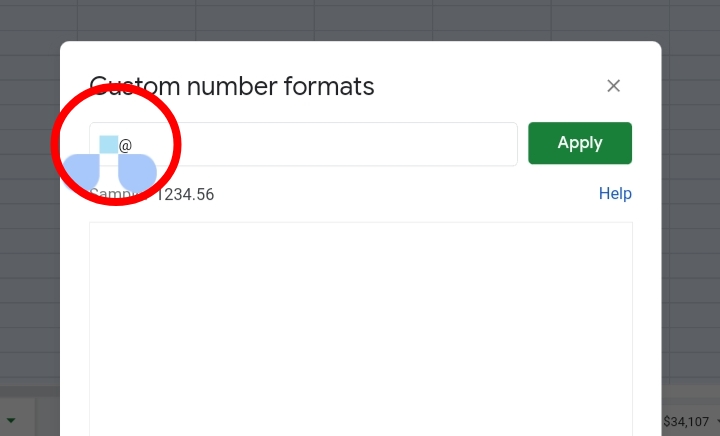
Step 5: A different tab is opened. In the empty text bar at the top, enter some spaces with the at (@) sign. For instance, we’ve added five spaces and a “@” in the text bar.
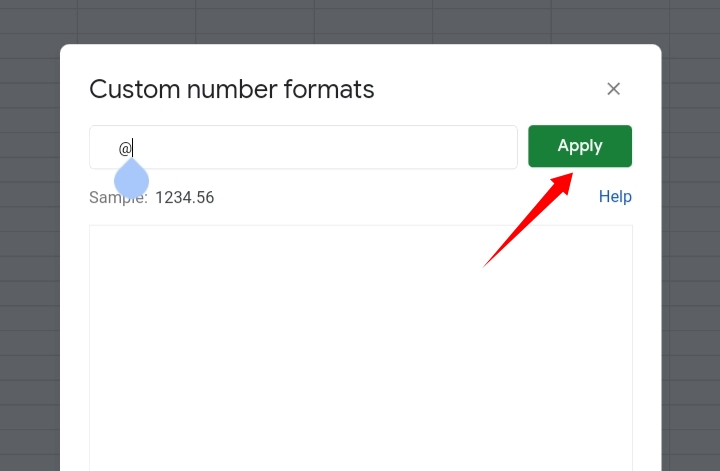
Step 6: Click Apply. The horizontal padding is applied to the worksheet.
Final Thoughts
Now you know How to Change Cell Padding in Google Sheets. Unlike Google Sheets, there is no tool for this so we’ve improvised and developed workarounds to overcome this problem.
If you know of other methods, do let us know. Thanks for reading. I hope you found this guide informative.


