Google Sheets always finds a way to make spreadsheet work and data entry much easier. One of these interventions is the Date Picker. It is an inbuilt tool that displays real calendar which allows the user to select dates.
It is most suitable if you are worried about the date’s formats being affected or typing in the dates manually. In this tutorial, we will discuss How To Add Date Picker In Google Sheets.
How To Insert a Date Picker in Google Sheets.
There are two ways of inserting a date picker in Google Sheets which are.
- Using the Google Sheets default setting.
- Creating one in an empty cell.
Method 1: Using the Google Sheets default setting.
This is the simplest way of inserting a date picker into your worksheet. All you need do is to enter a random date in the correct date format into a cell and double click it. A date picker is
displayed below the cell. It doesn’t matter the cell or date, it can be done on any cell on the worksheet.
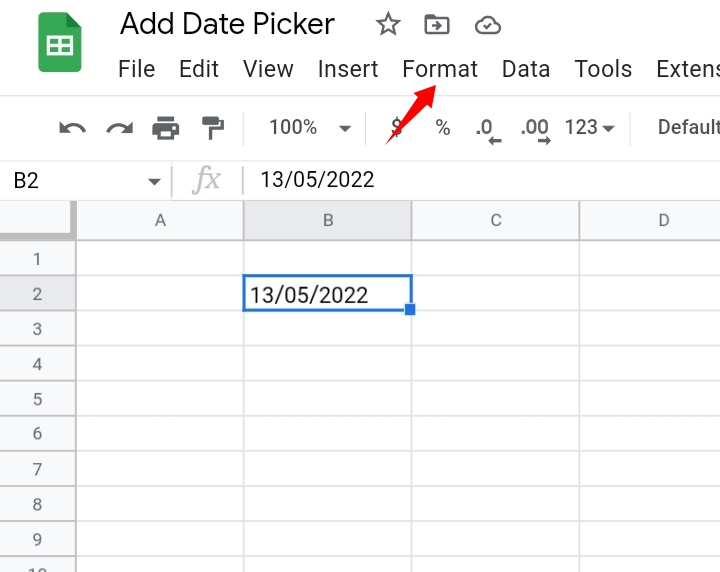
If you don’t know the correct date format, you can input a random number in a cell and format the cell as a date.
⦁ Go to Format on the toolbar.
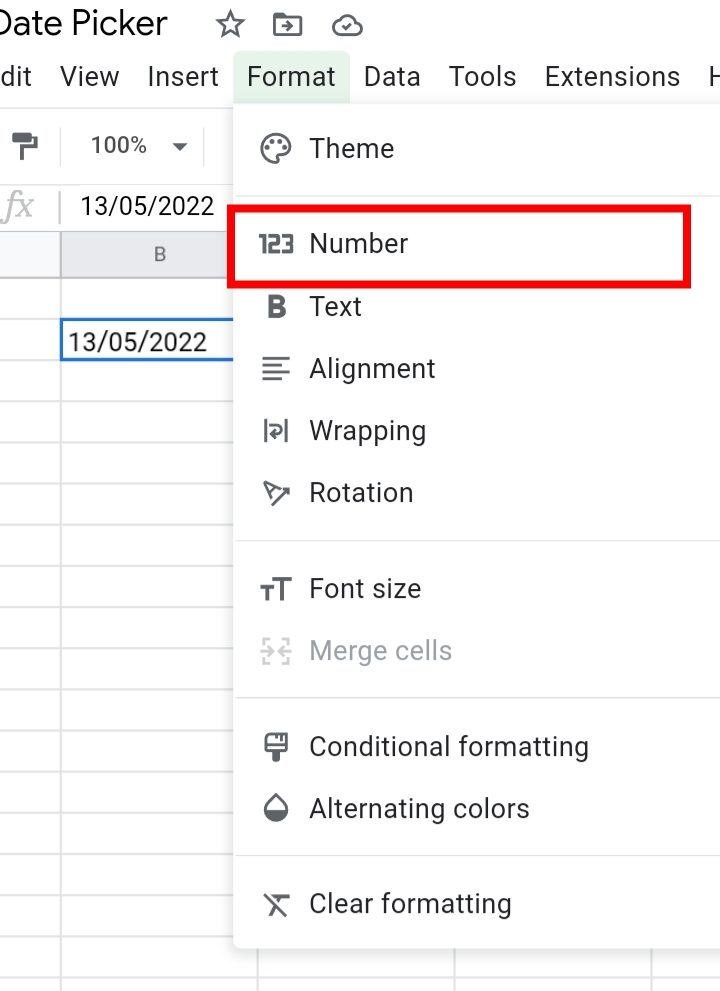
⦁ From the drop-down list, select Number.
⦁ Select Date.
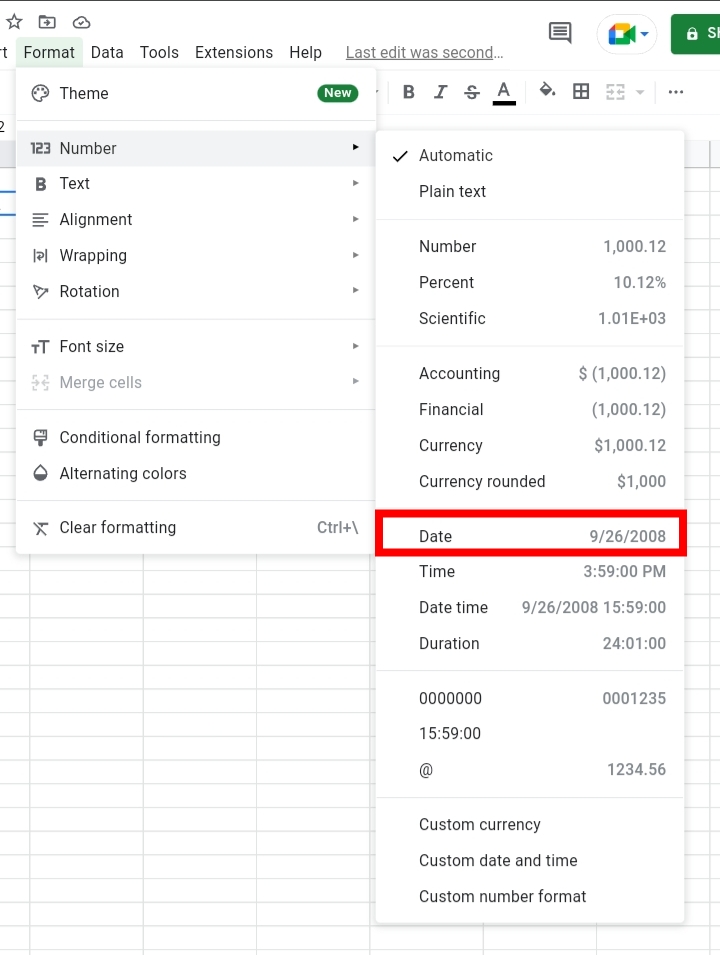
This would result in the date picker displayed next to the formatted cell.
Check out How to Insert Current Date and Time in Google Sheets.
Method 2: Creating a Date Picker in an Empty Cell.
You can also create a date picker that appears in an empty cell without entering a date. It is done in the following steps.
When does the Google Sheets Date Drop-down Appear?
The drop-down appears when the data validation feature is added to a cell.
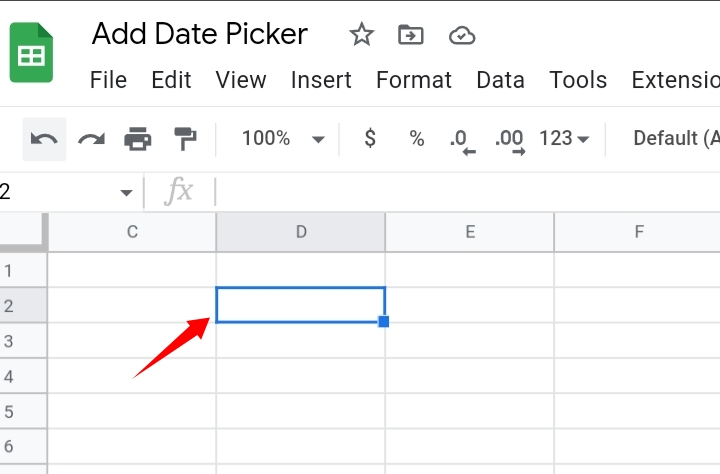
Step 1: Select an empty cell where you want the date picker inserted.
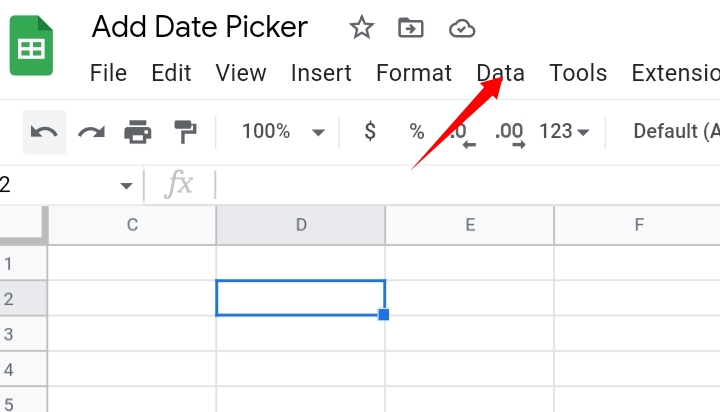
Step 2: Navigate to the toolbar and select Data.
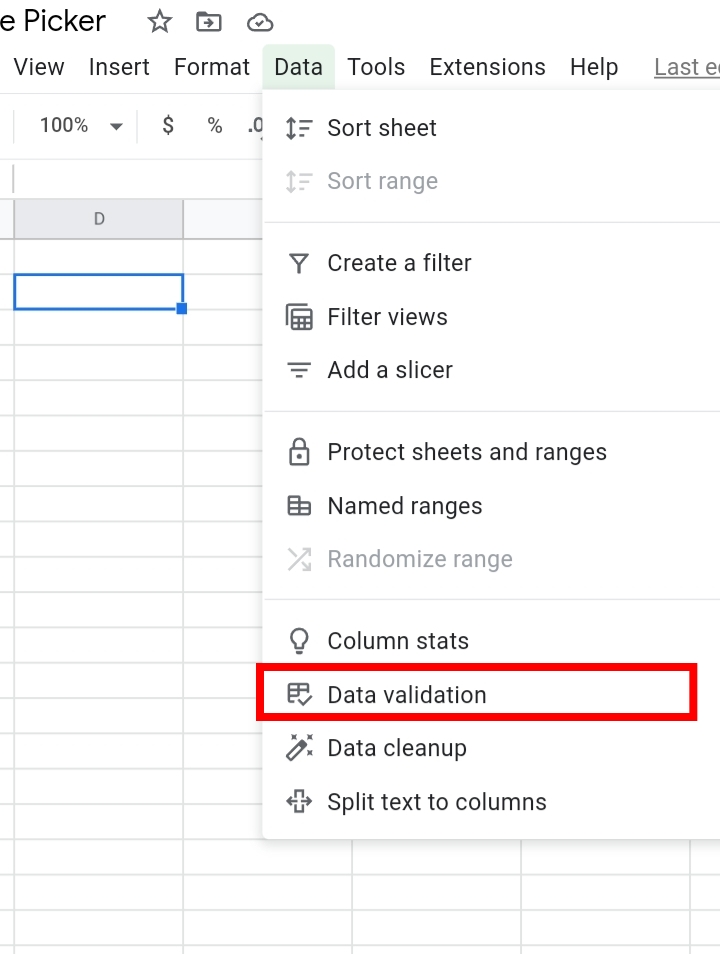
Step 3: From the drop-down list, select Data Validation. You can use a shortcut by right-clicking the cell and selecting Data Validation under “View more cell actions” from the list.
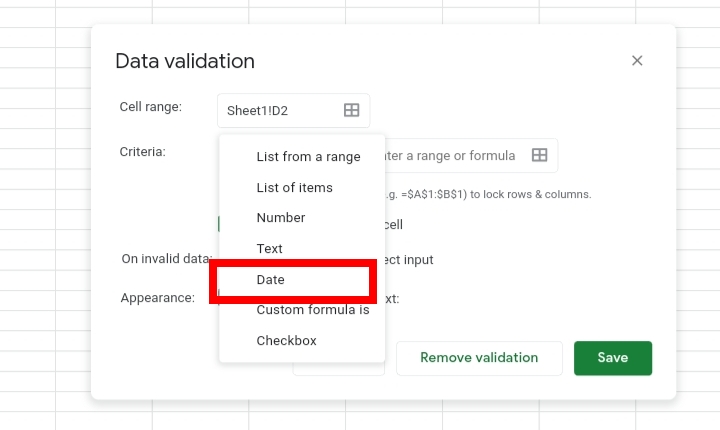
Step 4: The Data Validation tab is opened. In the Criteria textbox, select Date.
Step 5: Also select “Is Valid Date”.
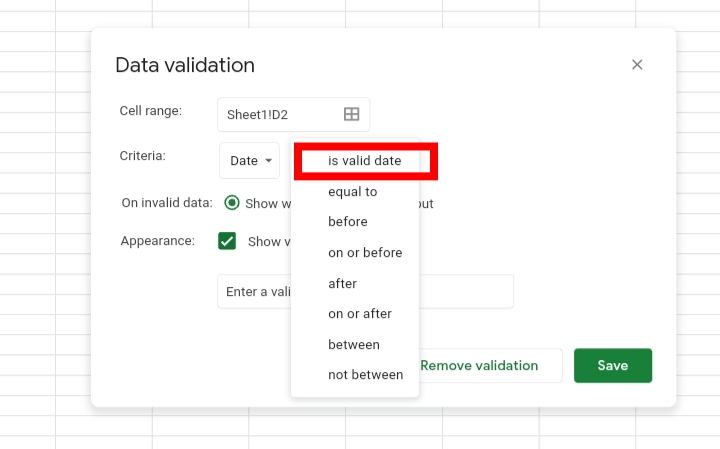
Under “On Invalid Data” ,set it to Reject Input.
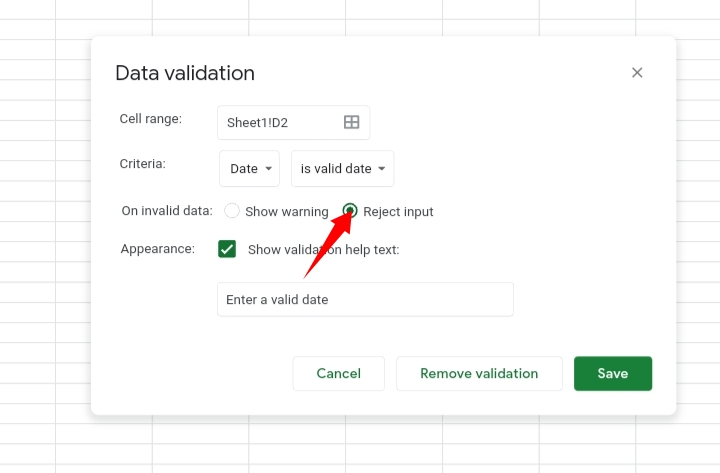
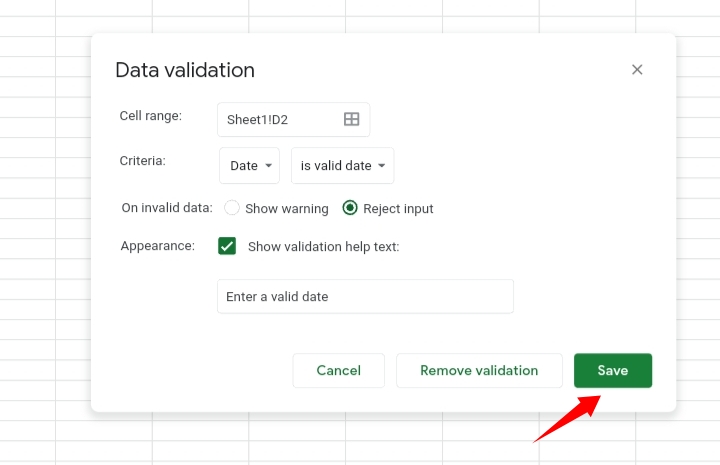
Step 6: Click on Save to save your validation. You can also add a text to your validation.
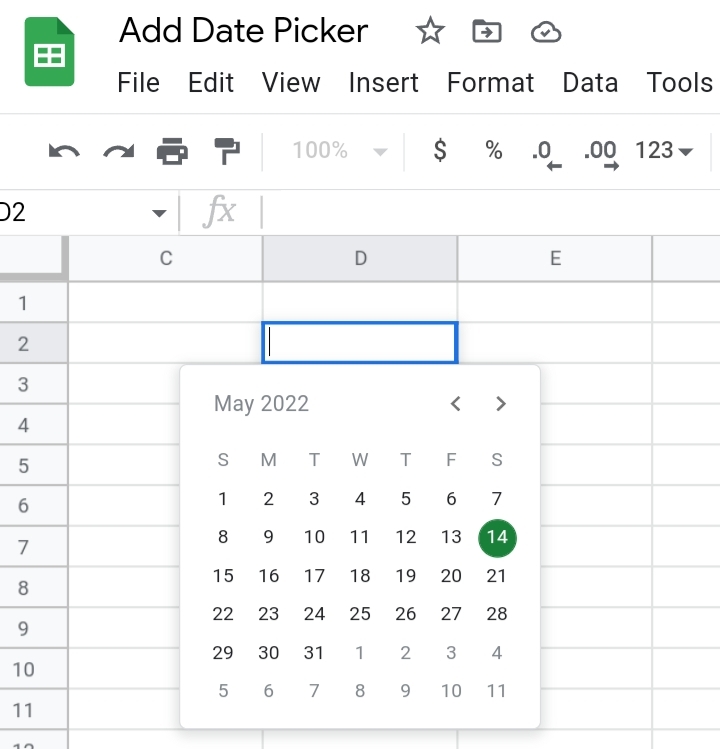
Step 7: Double click on the selected blank cell. A date picker is displayed.
Common Mistakes Working With Date Picker in Google Sheets.
- Under “On Invalid Data” selecting Show warning instead of setting it to Reject input. This means you can enter inaccurate dates into the date picker.
- Single clicking instead of double-clicking a cell.
- Wrong date formatting of cells. It can be changed by using the Format tool on the toolbar.
How to Remove Date Pickers in Google Sheets.
This is done by simply removing the data validation placed on the selected cell.
Step 1: Select an empty cell with the date picker inserted.
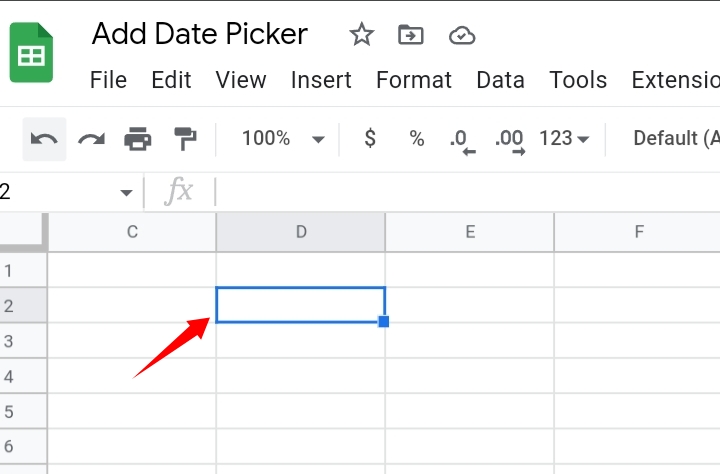
Step 2: Navigate to the toolbar and select Data.
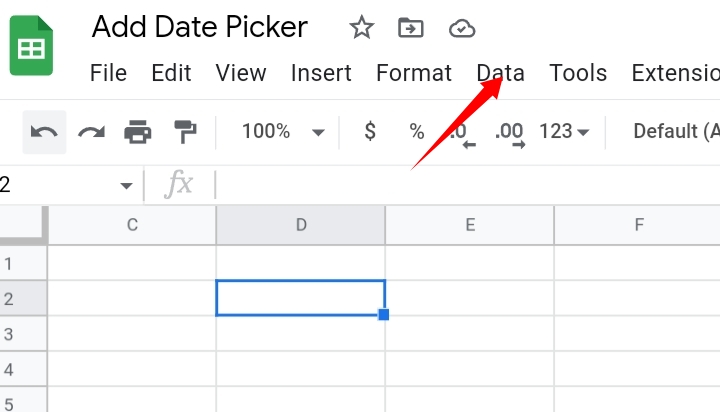
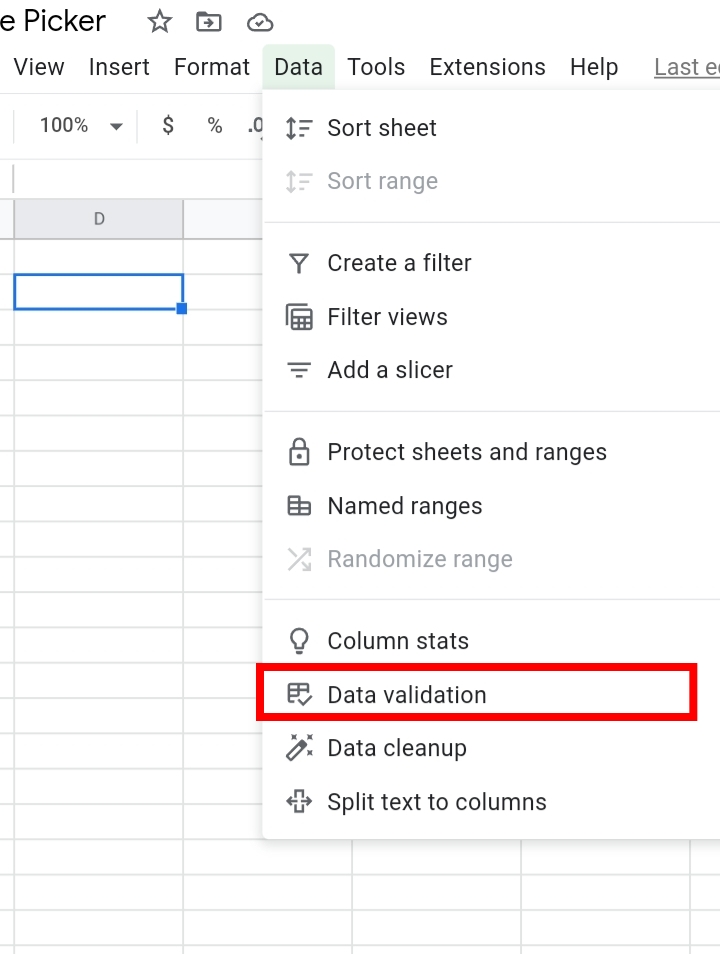
Step 3: From the drop-down list, select Data Validation. You can use a shortcut by right-clicking the cell and selecting Data Validation under “View more cell actions” from the list.
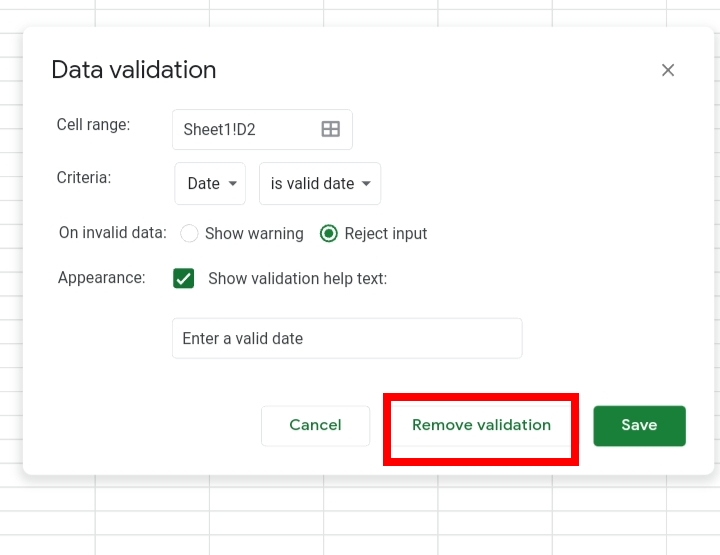
Step 4: The Validation settings are displayed. Click on Remove Validation.
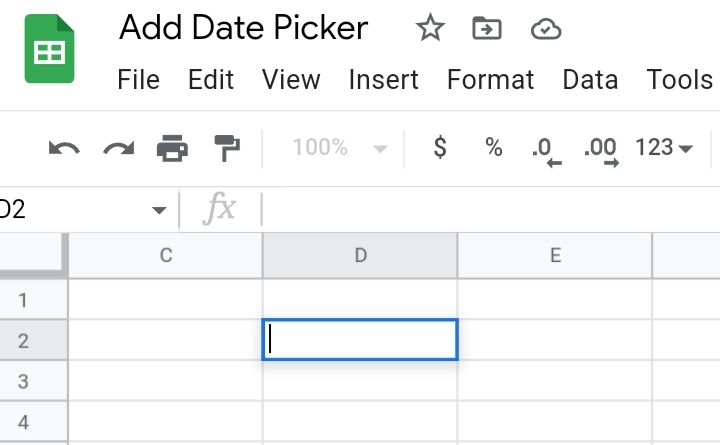
The date picker is removed.
Frequently Asked Questions on Google Sheets Date Picker (FAQs)
Why Insert Date Picker in Google Sheets?
Date Pickers are very useful for following up on date schedules and keeping tabs on daily events. It also helps in calculating the time range between two different dates.
How do I insert a Date Picker into my worksheet?
It is done by double-clicking a cell which has a date or has been formatted to the date format. It can also be inserted by using the Data validation method, you can check the section where this topic was discussed for better understanding.
How Do I Change the Date Picker Format in Google Sheets?
- Go to Format on the toolbar.
- From the drop-down list, select Number.
- Select Date. Change the custom settings. This allows you to change the format of your date picker.
How Do I Automatically Update the Date in Google Sheets When a Cell gets Updated?
If a new date is added or the previous date is changed, the NOW function is used. The NOW function changes accordingly to the change of a cell. It can also be set to
automatically update by time. The TODAY function can also be used to set simple time stamps.
How Do I Set up My Date Picker so that Only Dates in a Specific Range are Valid?
Under Data Validation, change the drop-down list default from ” The Valid Date” to the text you want your dates to adhere to. Example: between, from then adjust the parameters in the new textboxes there.
Final Thoughts.
Date Pickers are very useful for following up on date schedules and keeping tabs on daily events. It also helps in calculating the time range between two different dates in Google Sheets. It also allows Google Sheets users to select dates from a calendar placed on their worksheet.
In this tutorial, we have successfully learned how to insert date pickers into your worksheet with the Data Validation feature. I hope you found this easy guide helpful. Thanks for reading.


