Many times we are required to add a text box in google sheets. Text boxes are mainly added in google sheets in order to write some long comments and notes which would not fit properly in the cell.
Text boxes make the sheet look attractive and also grabs the attention of the reader. It becomes very helpful when one wants the readers to notice certain points. It is also possible to add more than one text box in google sheets for multiple purposes.
Today we will show How To Insert Text Box In Google Sheets in 2022 with very easy methods that anyone can use. This will not take more than 1 minutes. So, let’s go to know how we can do that.
How to Insert Text Box in Google Sheets
This site will help you guide through the process in easy and simple steps which everyone can follow.
Do focus on the pictures attached in every step for better understanding. And do continue reading till the end as there is free tip for the readers!
1. After opening the Google sheet you will find, towards the left hand side there is an option called “insert”. Click on that option.
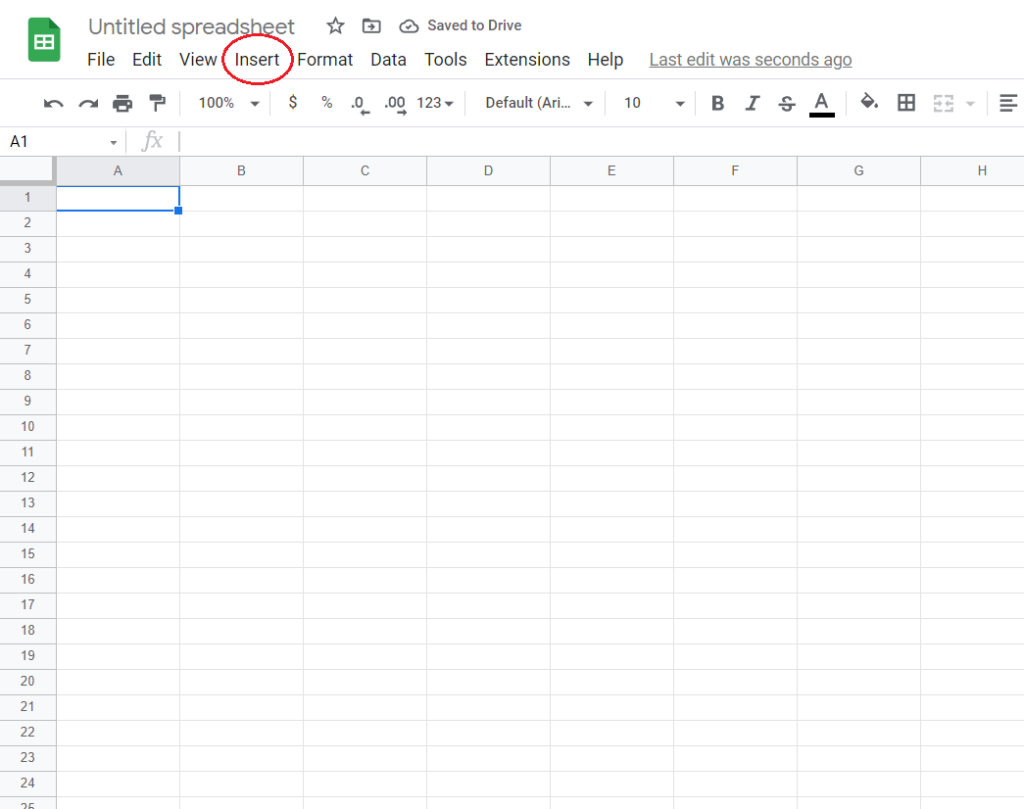
2. After clicking on “insert” a drop down menu will appear. Click on the option called “Drawing”.
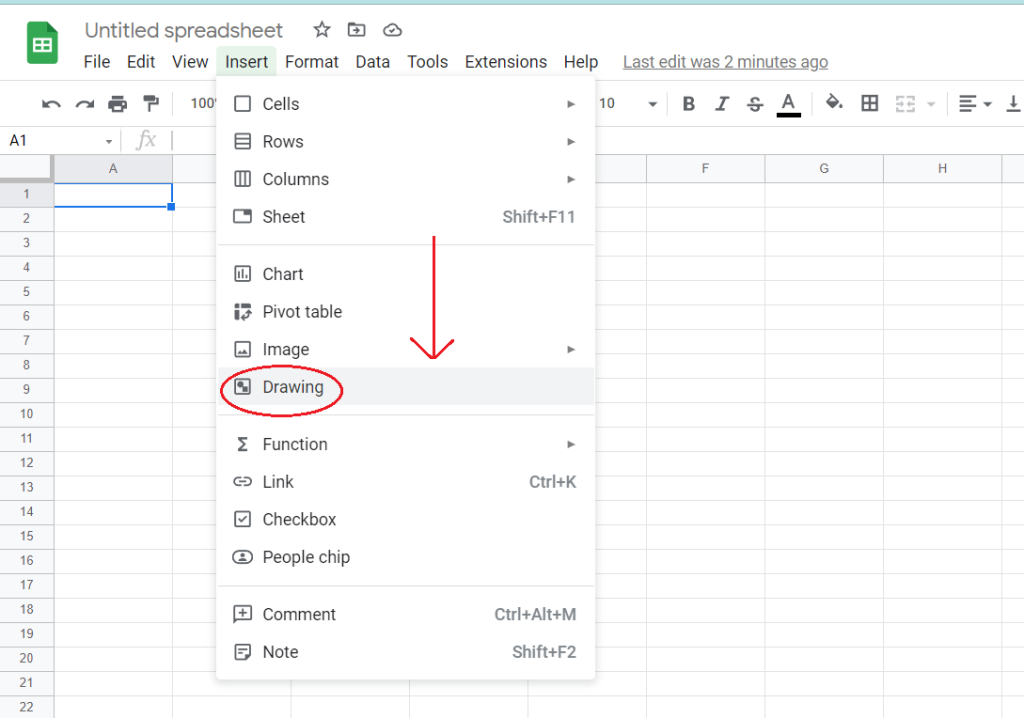
3. After clicking on “Drawing” a dialogue box will appear on screen. There will be a ‘text box’ icon option present at the top . Click on it as shown below.
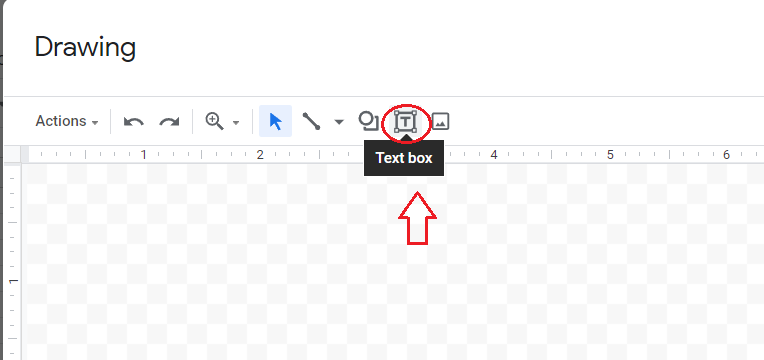
4. In order to insert the text box in Google sheet , the dialogue box needs to be clicked and held , to be dragged in the sheet.
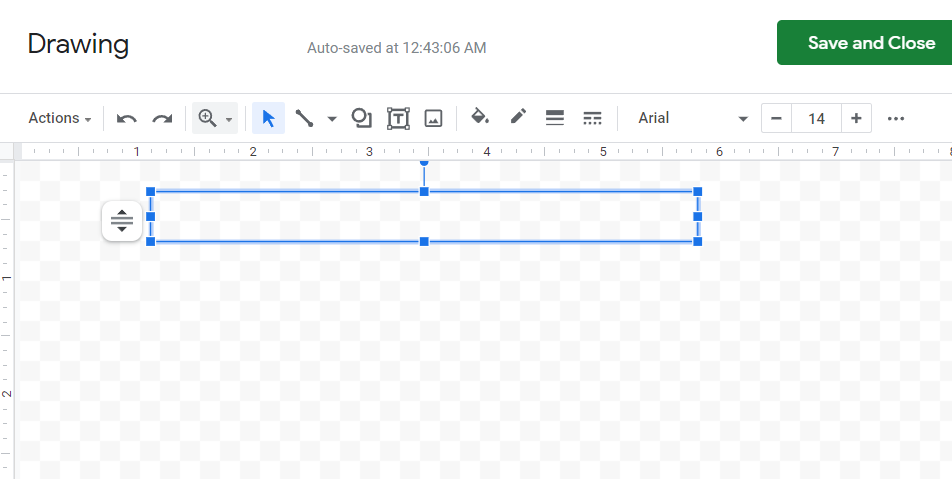
5. Now type out the text/comment/point/note that is to be shown in the text box.
Note that you can change the size of the text box ,according to the length of the text. Don’t panic if your text seems to exceed the text box.
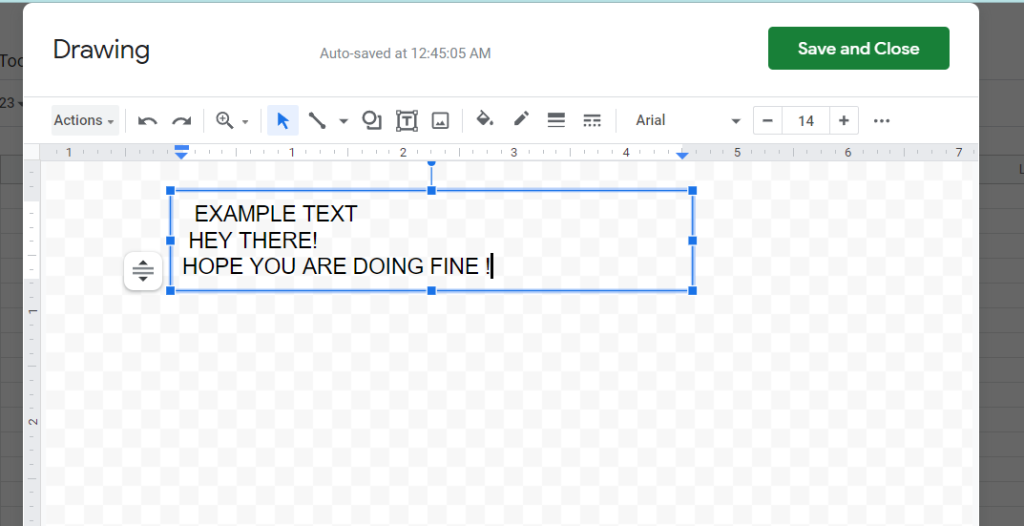
6. After writing the required text, click on the button ‘save and close’.
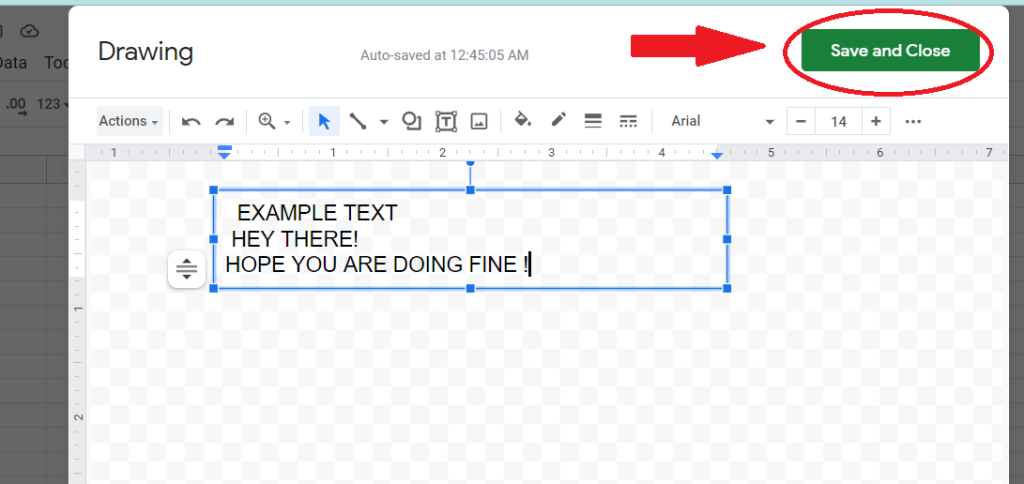
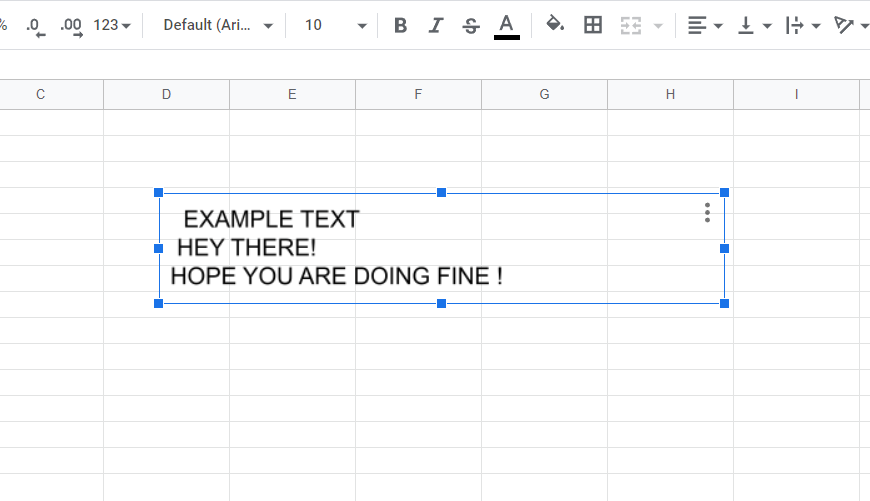
Follow these simple steps to insert a text box in Google sheets.
You can move around the text box all over the Google sheet and place it wherever desired simply by clicking and holding the text box.
(Point to be noted:) The text box will not be affected if you delete any row or column , write on the cells behind the text box or make any change in the Google sheet.
How to Formatting the Text Box in Google Sheets
The text box can also be formatted according to one’s needs. Formatting is mostly done to fulfill any specified criteria and also to make it look attractive.
The following are the different options available, with the help of which you can format the text box-
1. Changing the background color of the text box to any color.
2. Changing the size, color and font of the text written in the dialogue box.
3. Addition of border to the text box.
4. Highlighting specific parts of the text box or the entire text.
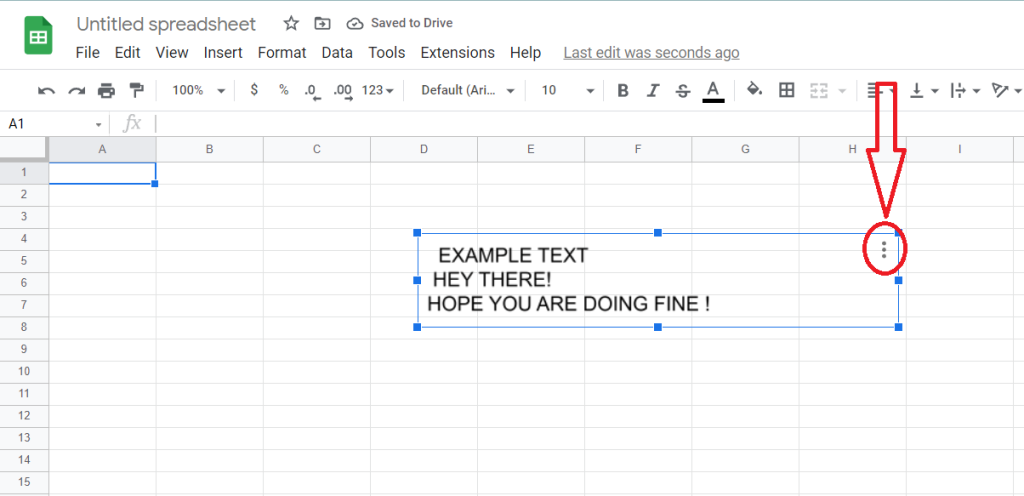
Points to be noted : Formatting can be done at any time, even after writing the text in the text box.
In case the text has already been written, you can format the text box by clicking in the box.
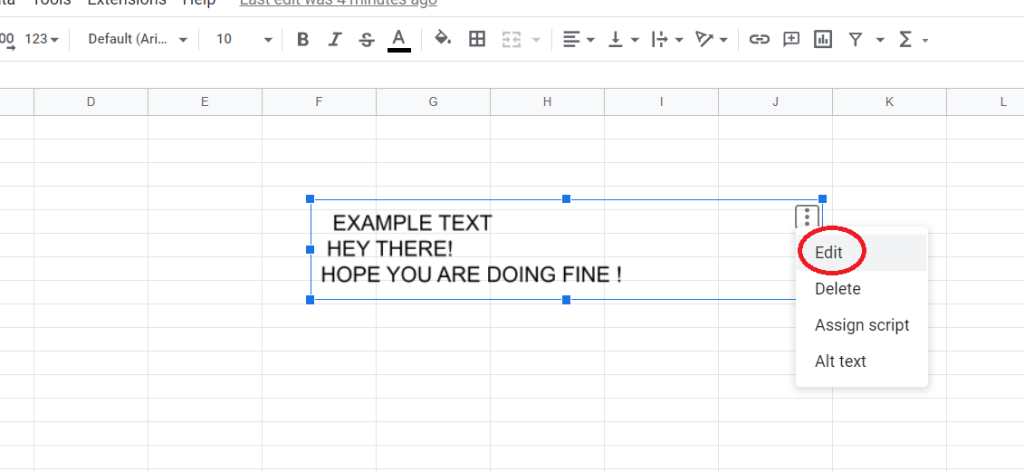
- You will see three dots , present at the right hand side top corner of the box. Click on it.
- After clicking on it, a drop down menu will appear. click on the edit option
- Then the drawing dialogue box will reappear where you will be able to perform the above mentioned points and edit the text box at ease.
How to Run a Script Using the Text Box In Google Sheets
Assigning a script to the text box essentially means that , when you click the text box , the Google Apps Script will automatically run.
The steps of assigning a script to the text box are as follows-
1. Take the cursor to the text box and click it.
2. On the top-right hand side corner appears three dots, click on it.
3. A drop down menu appears, there is an option called ‘assign script’.
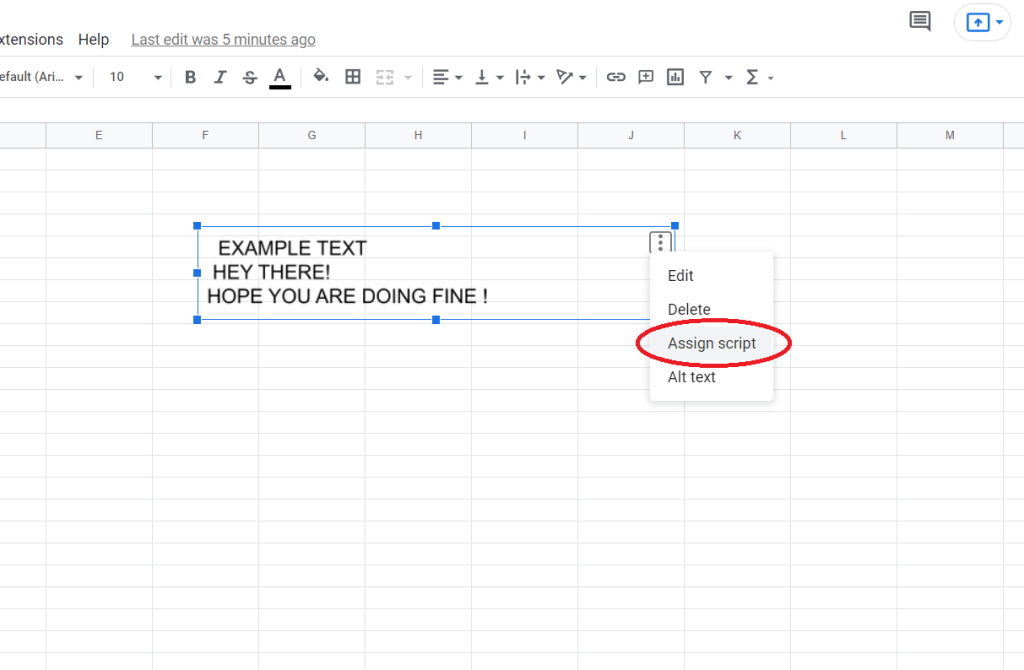
4. A dialogue box will appear saying ‘Assign script’, write down the name of the particular script.
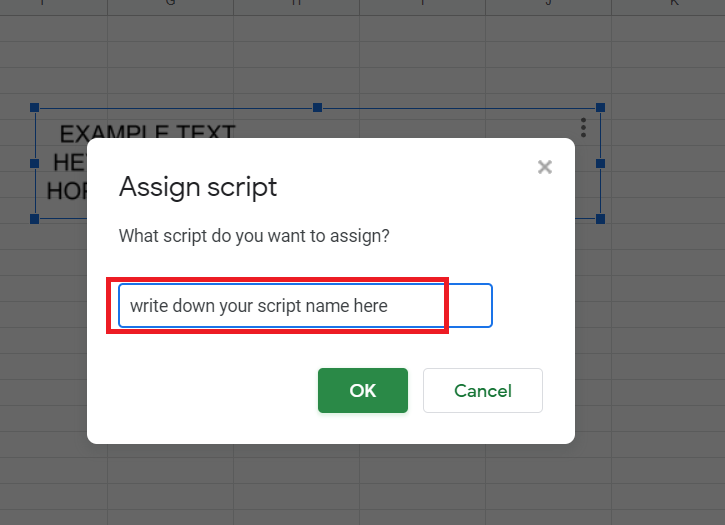
5. After assigning the name, click on the button ‘OK’.
Now when you click the text box, the script will automatically run.
The above mentioned ways are the most simple steps which can be easily followed and kept in mind. If you fail at any step do not panic, you can start it all over again.
Final Thoughts
Often people don’t know what exactly they are going to write in the text box. It is seen that one adds and then deletes the text, continuously modifying it.
So it is highly recommended to think and construct the text before adding or writing in the text box. Also there are different colors available for the text and background of the text box, try each combination and select the most suitable one!
I hope this tutorial helped you in adding text boxes to your sheets and making it look attractive ! Happy to help!


