Due to the automatic left and right alignment of texts and numbers in Google Sheets, the spreadsheet app lacks the indent feature.
This feature is so basic yet important that most users often require it to improve the clarity and visibility of the input data.
Since there’s no automatic or inbuilt mechanism to help out, we are going to improvise and discuss How Do You Indent In Google Sheets.
How Do You Indent In Google Sheets – Using 5 Methods
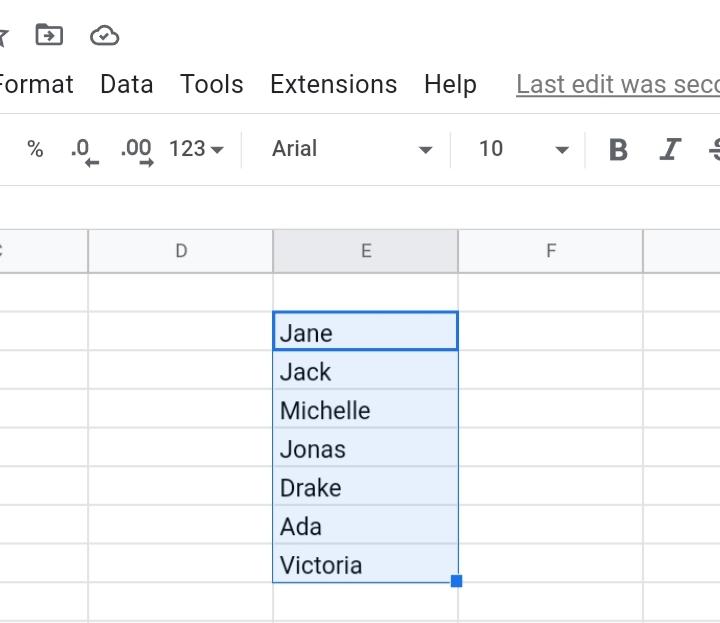
Here, we are going to discuss some brief and easy ways to indent texts in Google Sheets. In the sample worksheet below, we have a list of names in column A and we don’t like how close each cell’s content looks so close to each other.
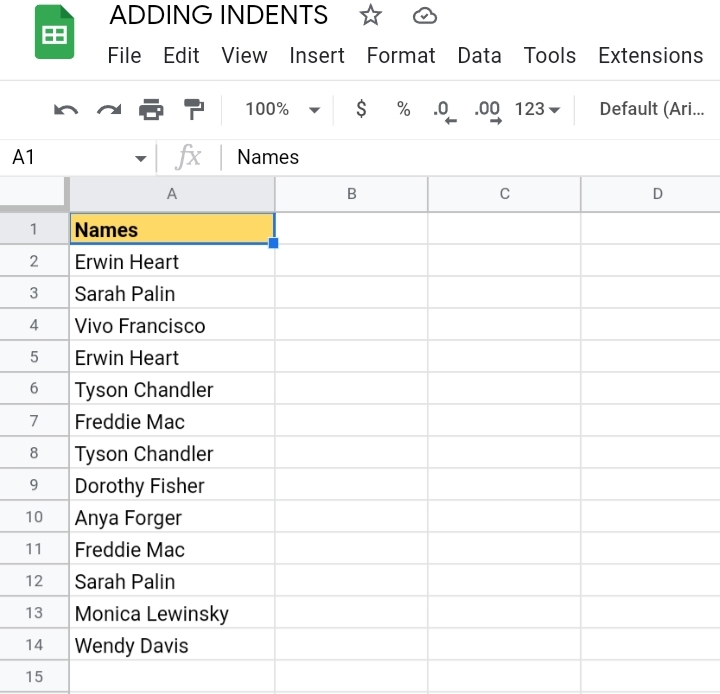
A text in the cell may get skipped or misspelt when reading. So, we are going to indent some texts so that it moves farther away from the left side of the cell.
Method One: Using Custom Number Formatting.
Custom formatting is added to a cell to change its content’s appearance and format. This is done in a few steps.
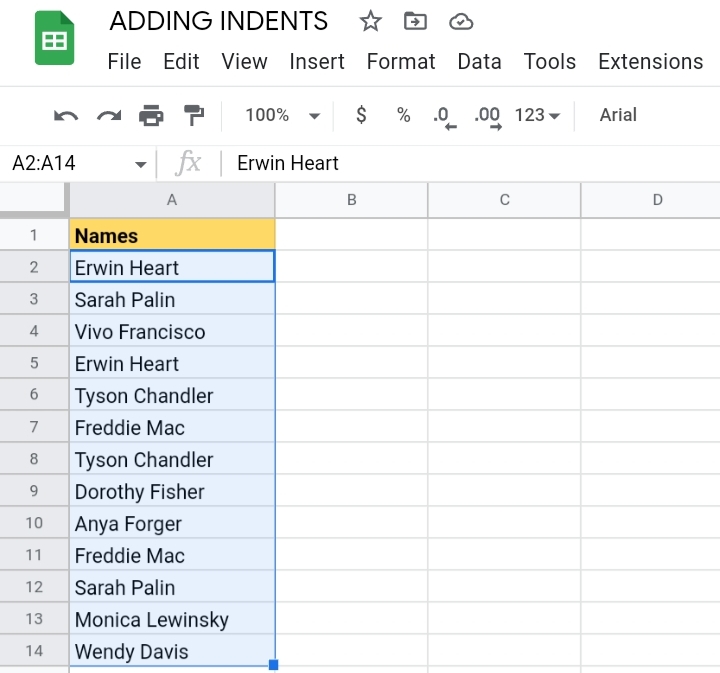
Step 1: Select or highlight the cells which you want to format.
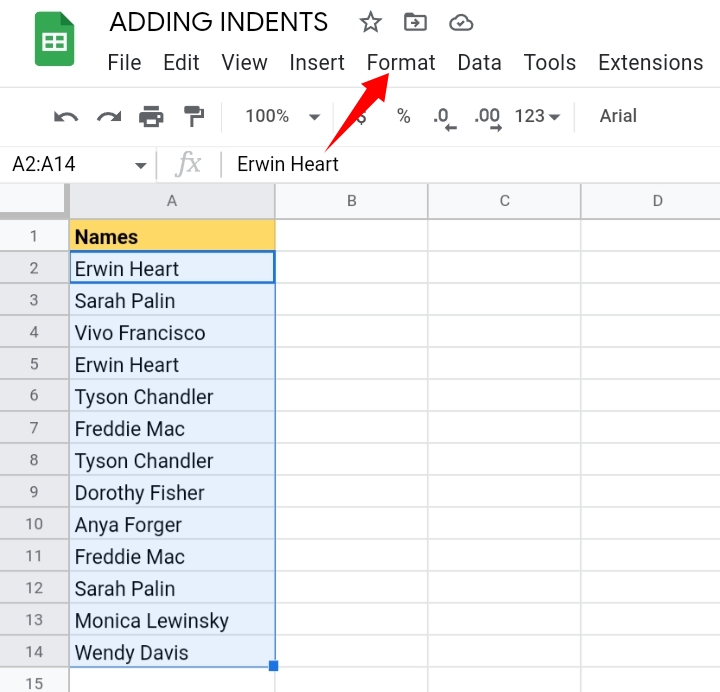
Step 2: Navigate your way to the toolbar and select Format.
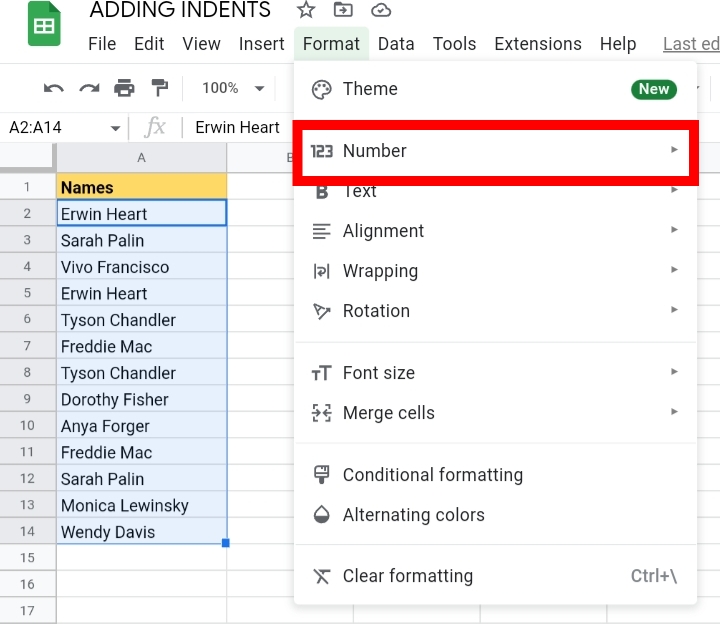
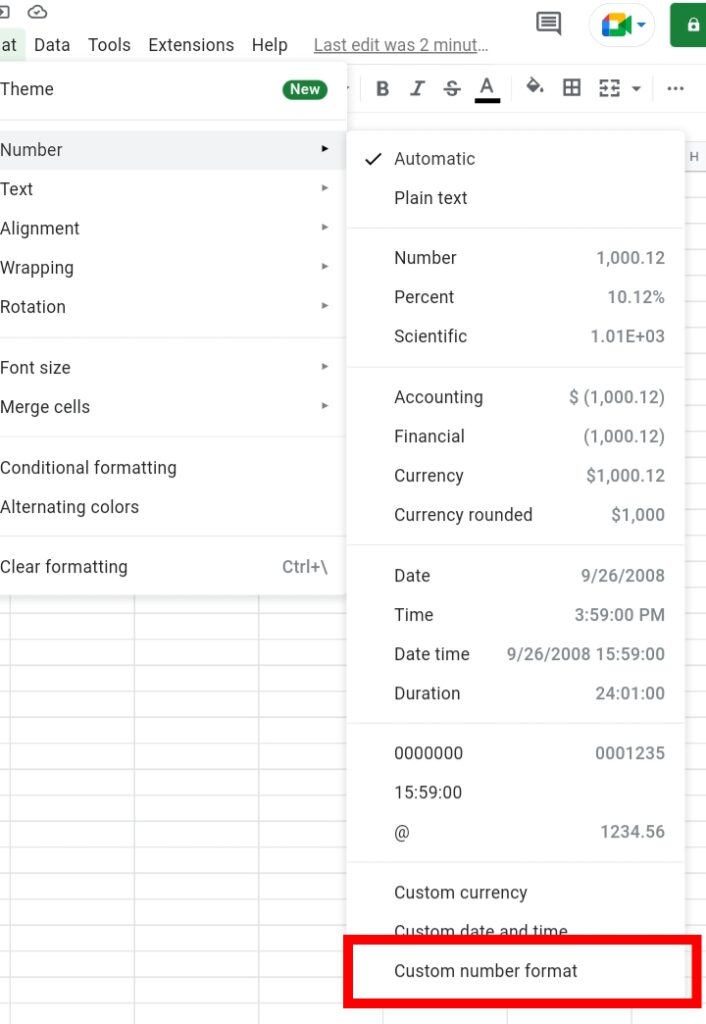
Step 3: From the drop-down list, click on Number. I know you’re thinking that we have text values in the cells and we are clicking on the number section.
The Number format won’t change your values, only its format and it can be used on both texts and numbers.
Step 4: From the Number drop-down, select Custom Number Formats.
Step 5: The Custom Number tab is opened. In the textbox above, enter six spaces and a ‘@’ sign. That is ” @”. Do not include the double quotation marks. If you do, you may get a different format or an error might occur.
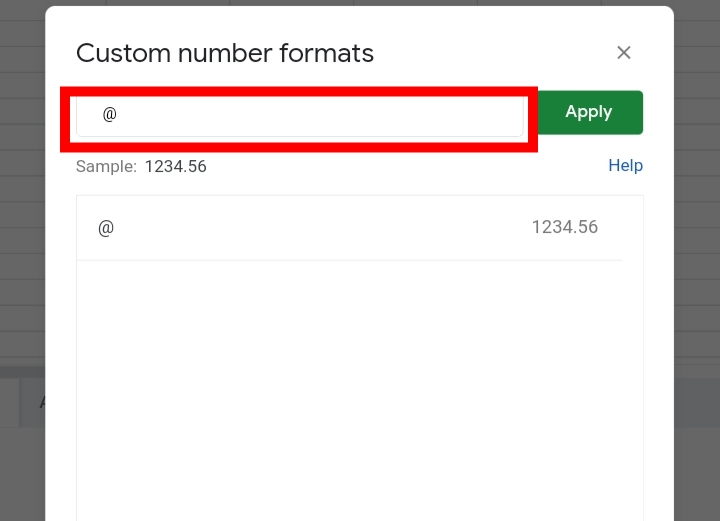
By doing so, we are telling Google Sheets to add six indent spaces in the selected cell range.
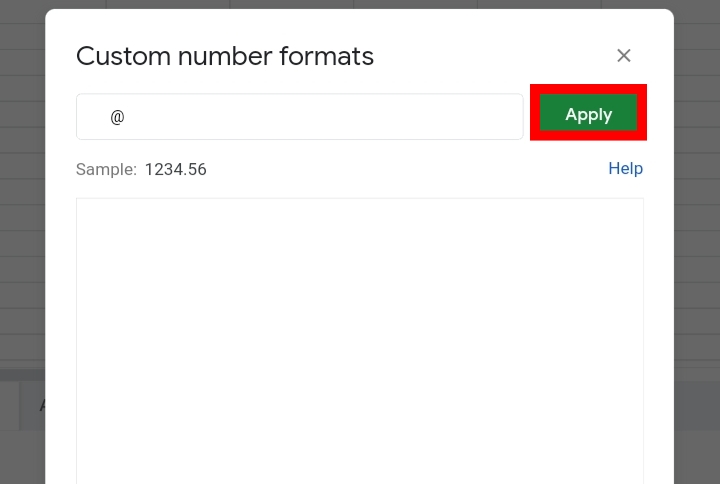
Step 6: Click on Apply.
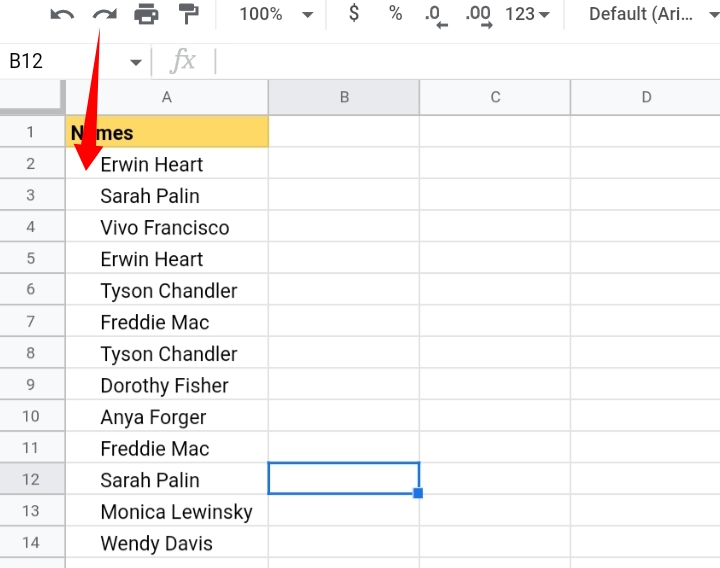
As you can see, the above steps resulted in adding indents into the cells in column A. Remember that only the cell’s format has changed and not the text in the cell.
Method Two: Applying Indentation Into New Cells.
In a case where you want to apply indentation into a new column, for example, Column B. This is done by copying and pasting the indentation into the cells.
This is quicker than repeating the custom formatting process all over again. This is done in the following ways.
Step 1:Select a cell in column A that has the indentation applied.
Step 2: Right-click the cell and select copy or use the keyboard shortcut (Ctrl key + C).
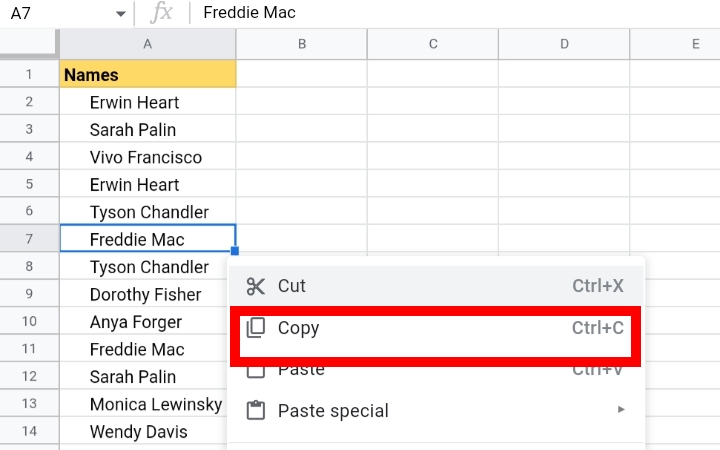
Step 3: Select the range of new cells where the indent would be pasted.
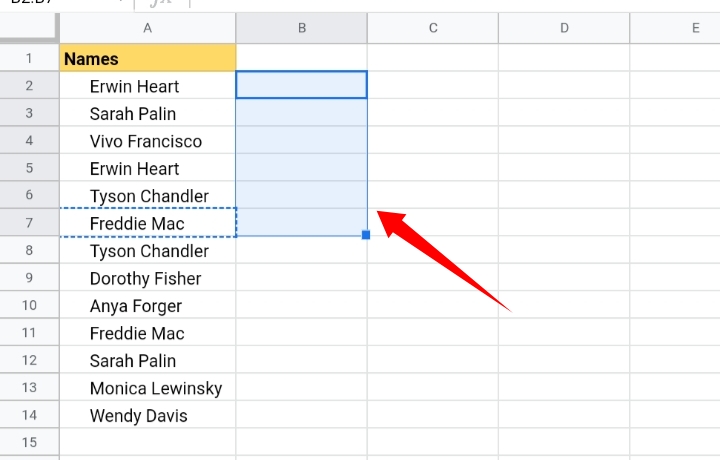
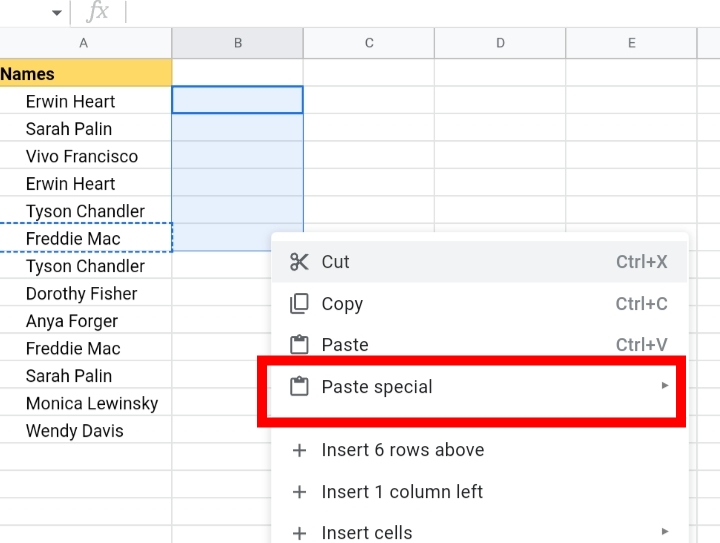
Step 4: Right-click on the selected cell range and select Paste Special from the drop-down list.
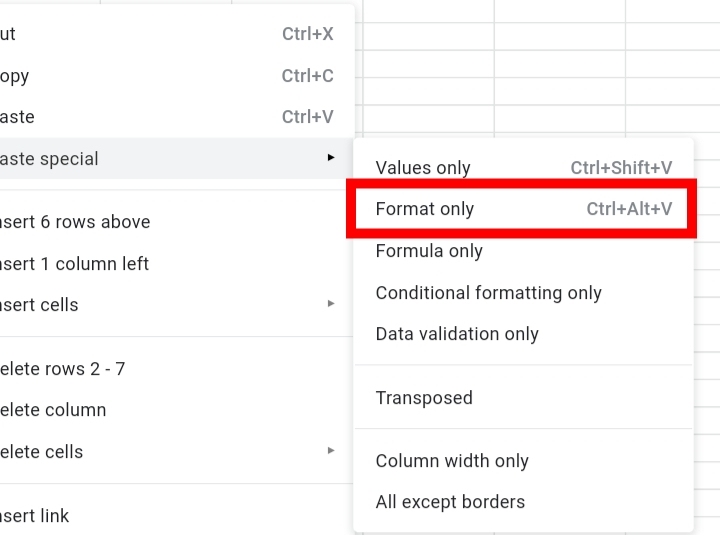
Step 5: Additional options are displayed. Select Format Only or use the keyboard shortcut, Ctrl key +Alt key + V. This pastes only the indent format without pasting the copied cell’s content.
Step 6: If any text is entered into the cell, the indent is automatically displayed in the cell.
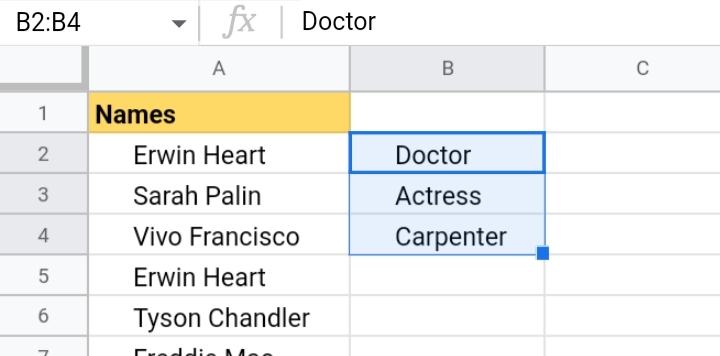
Note that this method copies the special formatting used in the copied cells. It could be border style, or text format (bold, italics, cell color, text color).
It would be copied into the cell alongside the indentation.
Method Three: Adding Indentation by Adding a Column.
This method requires two different columns. So if you want to use this method, you might need to divide your dataset into two different columns.
You may think it’s difficult, but it’s as easy as the previously discussed methods. This is done by following the steps below.
Step 1: Select the column with the indents inserted into it by clicking on the top of the column. Here, we selected column A.
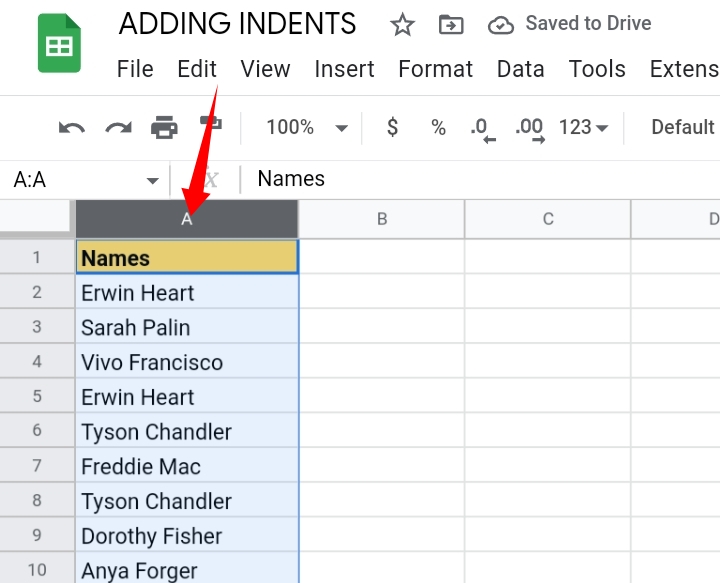
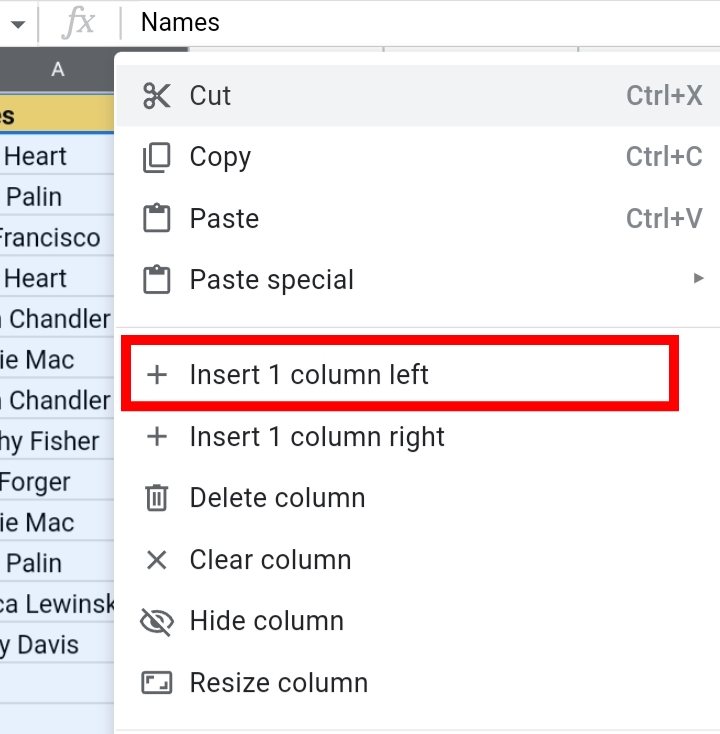
Step 2: Right-click the column and click “Insert 1 column left”.
An extra column is inserted to the left, shifting the current column A to column B.
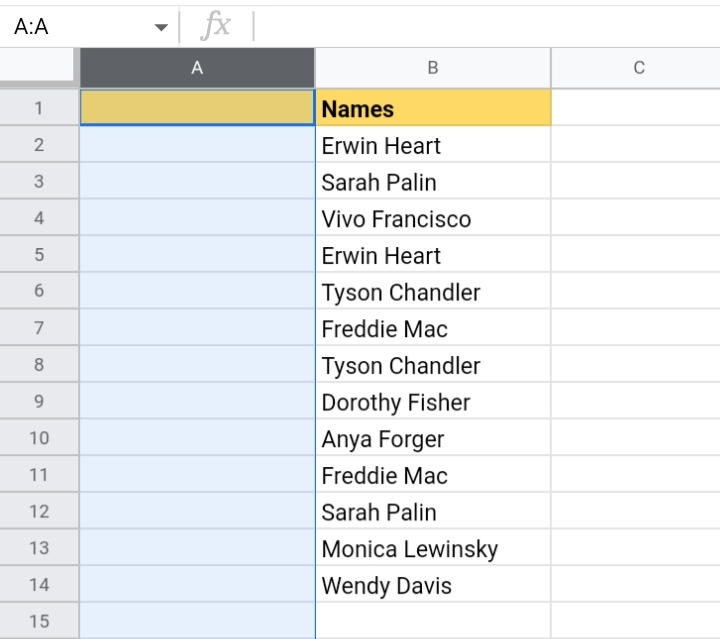
Step 3: Reduce the size of the column by clicking on Resize and adjusting the size of the column by entering the amount of pixels that fit the size of the indents.
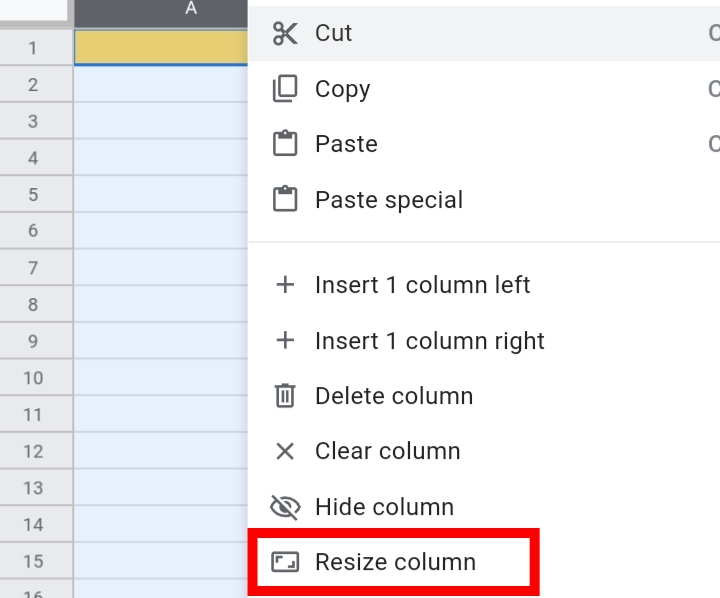
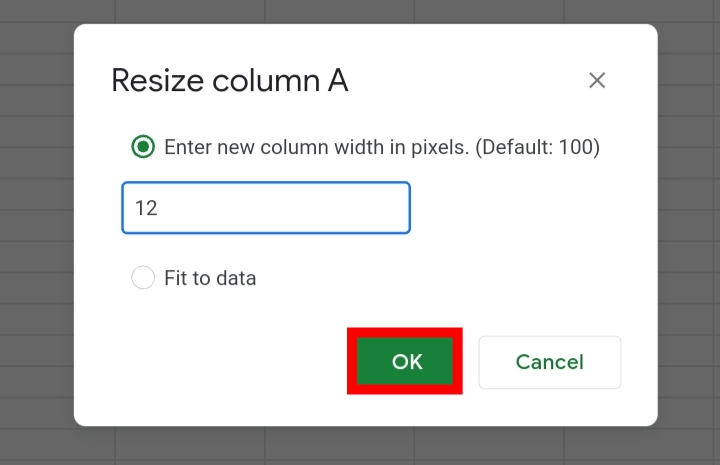
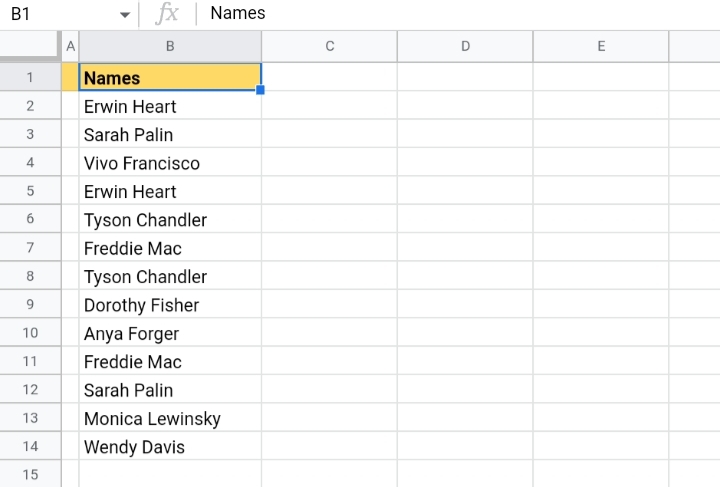
The reduced column somewhat looks like indents for column B. This isn’t the best approach to adding indents but it does serve its purpose.
Method Four: How To Autofill Indented Cell in Google Sheets to Indent Faster.
Let’s say you have a single cell indented in your worksheet. But you spread and paste the indentation into the other cells.
This is done by using the autofill feature. Most Google Sheets users are very familiar with this feature and it is very quick and efficient to use.
Step 1: Hover your cursor on the bottom right of the cell. It changes into a plus cursor (+).
Step 2: Drag the plus cursor downwards to copy the indentation into as many cells as you want.
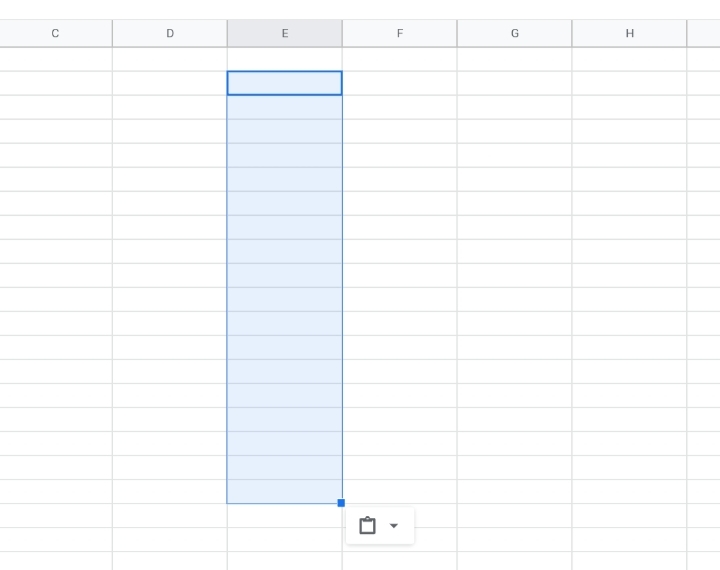
The cells have indentations inserted in them. Now, you can enter any text into these cells and the indents keep them orderly in the cells.
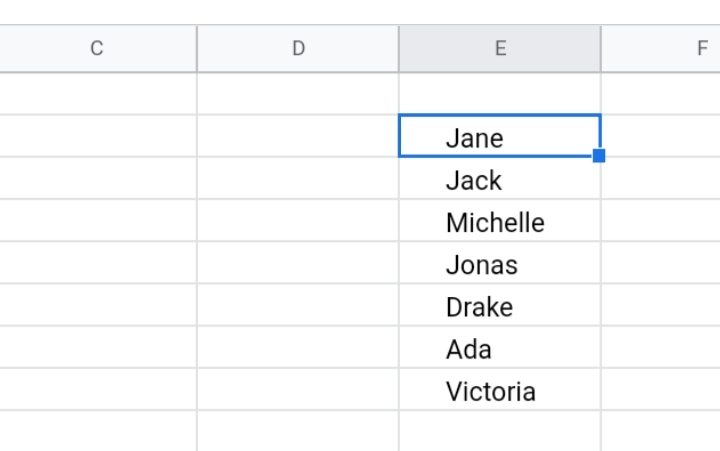
Method Five: The Use of Apps Script Code.
This is a more complex and advanced method. It may be considered difficult for users who aren’t familiar with the Apps Script add on.
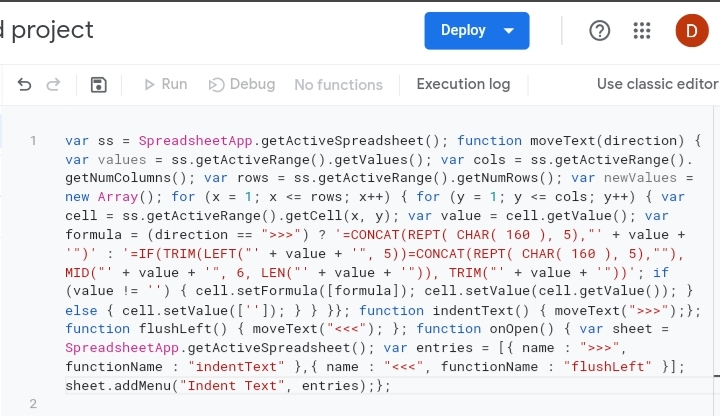
Its results are no different from the previous methods. But if you want to use this method. Copy the code below to your Apps Script code editor and save the code so that it can start working with full effect. Here’s the code.
var ss = SpreadsheetApp.getActiveSpreadsheet();
function moveText(direction) {
var values = ss.getActiveRange().getValues();
var cols = ss.getActiveRange().getNumColumns();
var rows = ss.getActiveRange().getNumRows();
var newValues = new Array();
for (x = 1; x <= rows; x++) {
for (y = 1; y <= cols; y++) {
var cell = ss.getActiveRange().getCell(x, y);
var value = cell.getValue();
var formula = (direction == “>>>”) ? ‘=CONCAT(REPT( CHAR( 160 ), 5),”‘ + value + ‘”)’
: ‘=IF(TRIM(LEFT(“‘ + value + ‘”, 5))=CONCAT(REPT( CHAR( 160 ), 5),””), MID(“‘ + value + ‘”, 6, LEN(“‘ + value + ‘”)), TRIM(“‘ + value + ‘”))’;
if (value != ”) {
cell.setFormula([formula]);
cell.setValue(cell.getValue());
} else {
cell.setValue([”]);
}
}
}
};
function indentText() {
moveText(“>>>”);
};
function flushLeft() {
moveText(“<<<“);
};
function onOpen() {
var sheet = SpreadsheetApp.getActiveSpreadsheet();
var entries = [{
name : “>>>”,
functionName : “indentText”
},{
name : “<<<“,
functionName : “flushLeft”
}];
sheet.addMenu(“Indent Text”, entries);
};
This is done by following the steps below.
Step 1: Open your worksheet and click on Extensions on the toolbar.
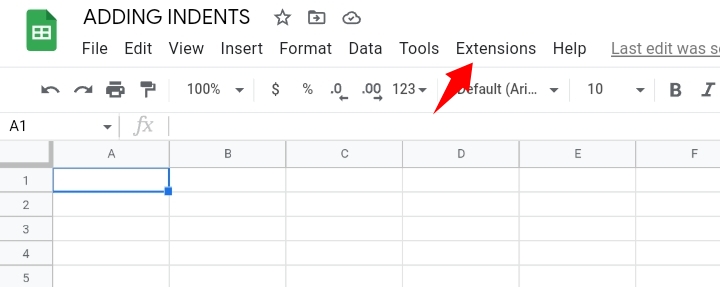
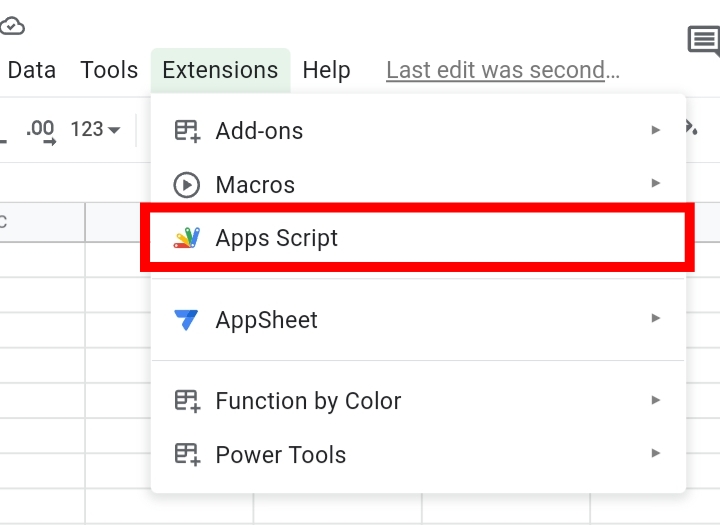
Step 2: From the list of add ons, select Apps Script.
Step 3: You’ll be redirected to the Apps Script website and a blank script is provided for you.
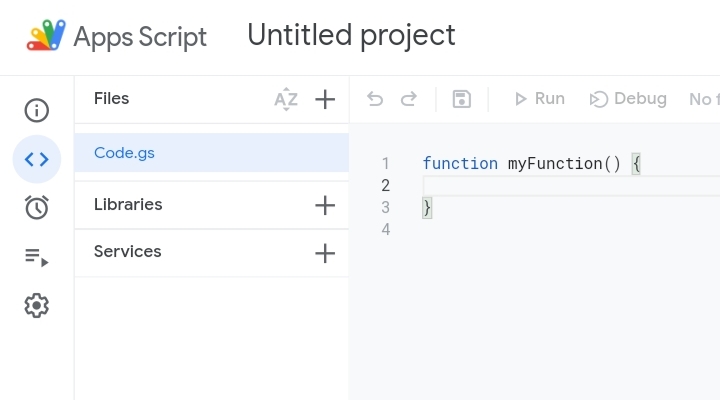
Step 4: Clear the dummy function placed there. Copy and paste the code above into the blank script.
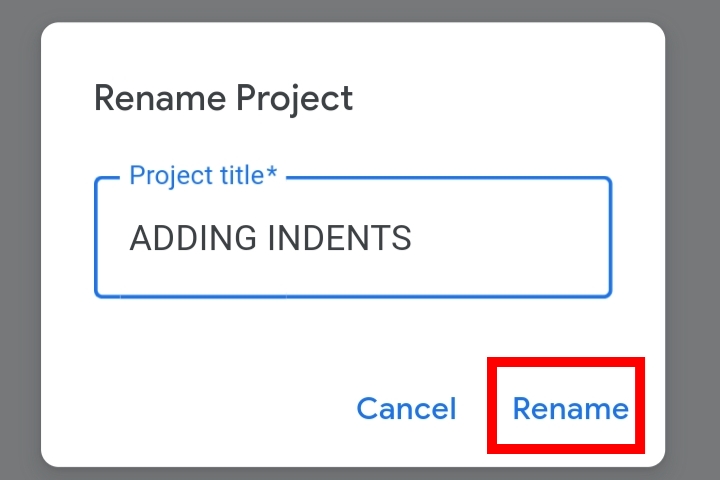
Step 5: You can rename the code if you want to. I renamed mine as Adding Indents.
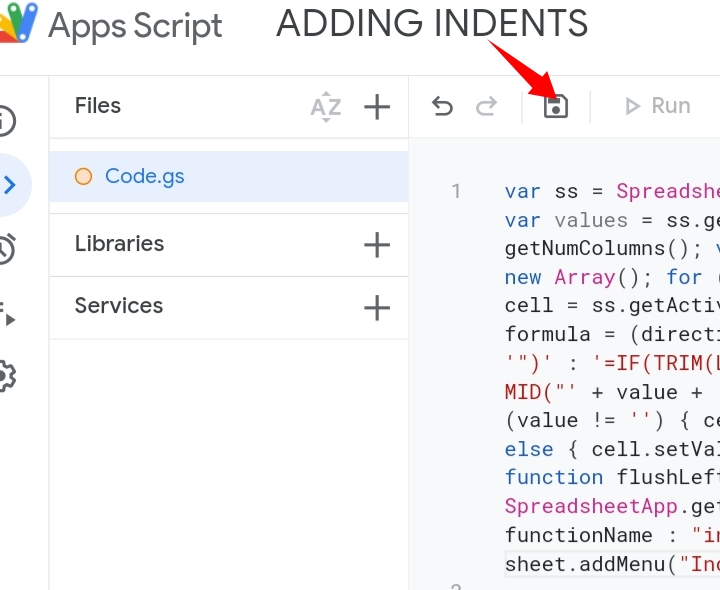
Click on the Save icon.
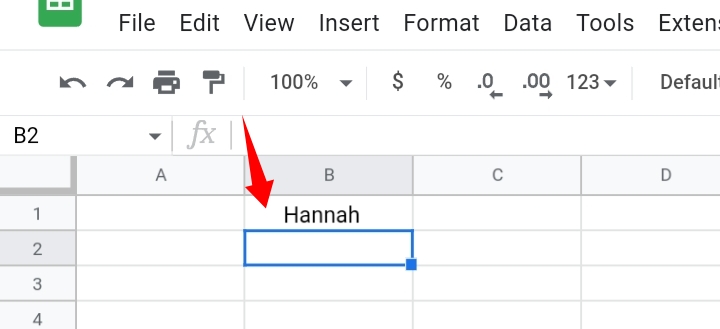
Step 6: Come back to your worksheet and enter a random text into the cell and indentations are inserted.
Removing Indentations in Google Sheets.
This is done by simply changing the cell’s format. It is executed by following the steps below.
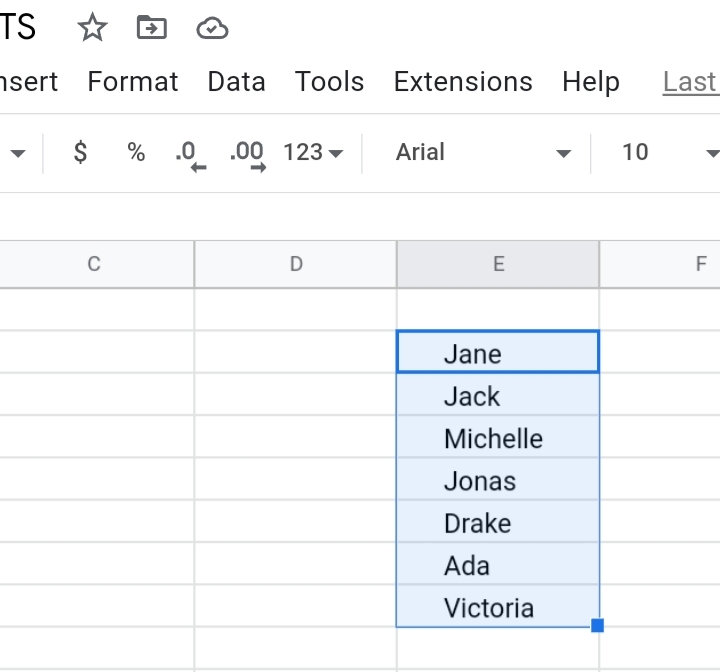
Step 1: Select the cell or cells with the inserted indentations.
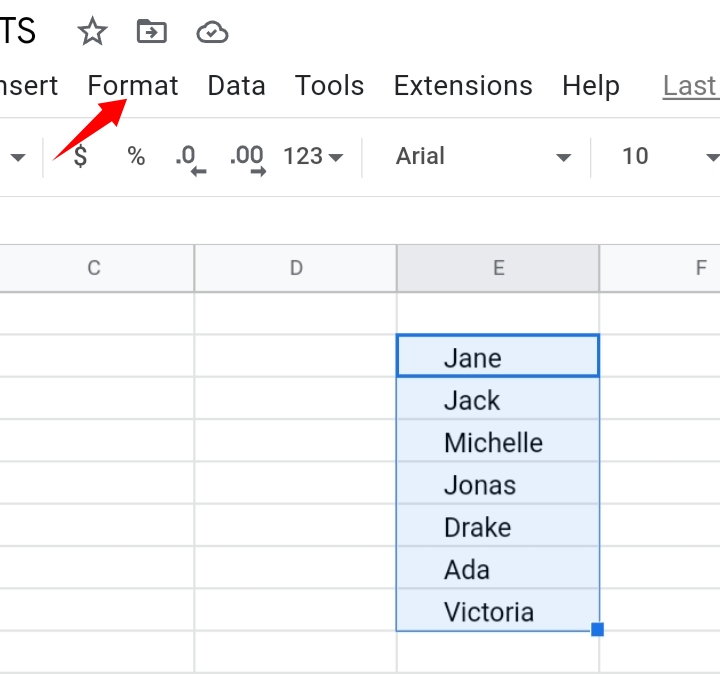
Step 2: Navigate your way to the toolbar and select Format.
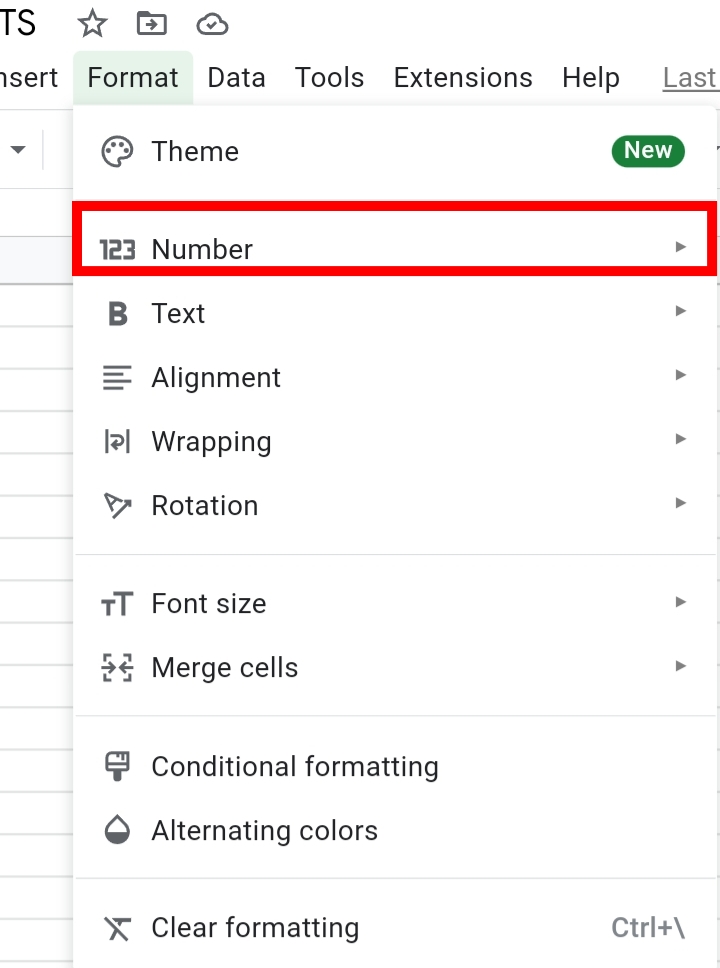
Step 3: From the drop-down list, click on Number.
Step 4: Additional options are generated into a dropdown list. Select Automatic.
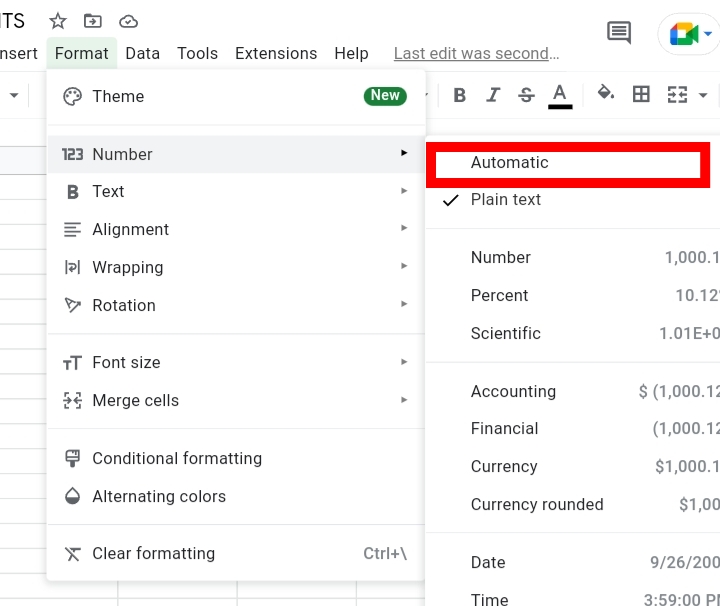
This format returns the cells to their original format. The cell’s contents would no longer be indented and every other additional format like border and text style would also be removed.
Frequently Asked Questions on Adding Indents in Google Sheets (FAQs)
When you have two lines of text through wrap text, sometimes you can only insert an indent in the first line. How do you resolve this issue?
To solve this, simply click the cell and hold the space key for as long as you want the inserted indent to be.
What can you do with the Google Forms Script Editor?
This add on inserts Google Analytics features into your worksheet. It also enables your worksheet with the following.
- Add thesaurus to your worksheet file.
- Enable social questioning.
- Create custom menus and functions.
What is the similar code that allows the user to indent single lines into a cell and lets you run the scripts hotkey?
To do this, click and select the cell where you want to add the indentation. Place the cell into edit mode by clicking on it or using the shortcut F2. After you’ve done this, hold the space key for a while.
Then, input the text string and hit the enter key to finish.
Final Thoughts
Now, we’ve fully discussed and disseminated what this feature is about and how it can be inserted. Although indentations aren’t inbuilt in Google Sheets like other document applications like Google Docs, Microsoft Word and a similar spreadsheet app like Microsoft Excel.
These methods may seem strenuous at first but with enough time and practice, you’d become fond of using this feature in your everyday data entry.
Now you know How Do You Indent In Google Sheets. I hope you found this guide helpful. Thanks for reading.


