Sometimes we need to divide the text into columns and insert lines in google docs. You may think it’s hard to do. However, you will be happy to know that you can do that in a few minutes.
Today we will show how to add a line between columns in google docs. But, first, you need to follow the step-by-step process.
So, let’s go to know how you can do that.
Add Line Between Columns In Google Docs
Follow the below steps to add lines between columns in google docs.
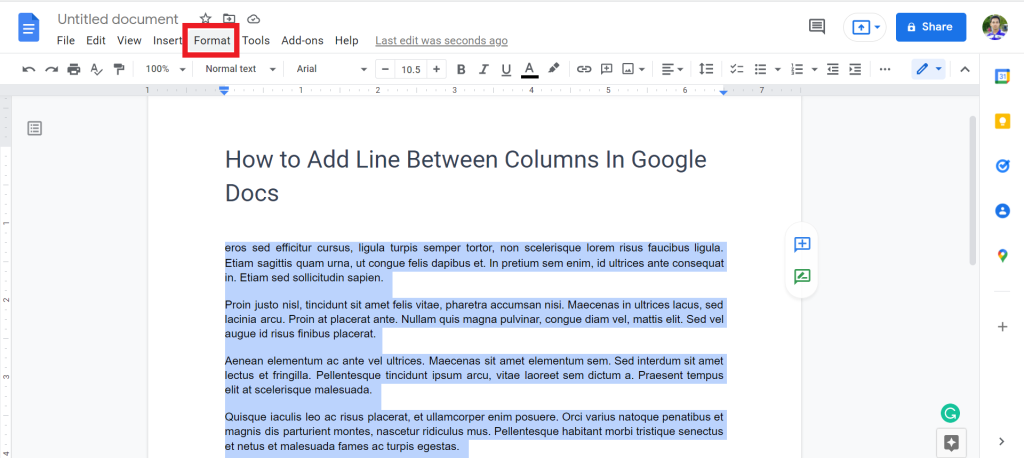
1. Open google docs and select the text. Then, tap on the Format option.

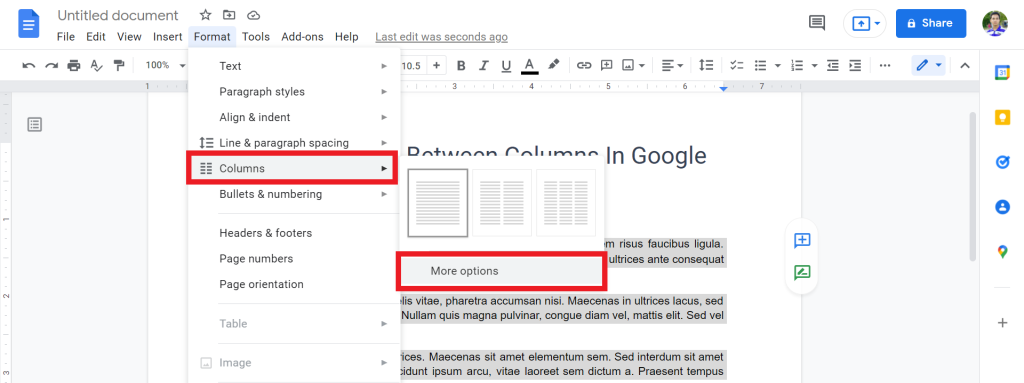
2. From the list, select Columns > More options.

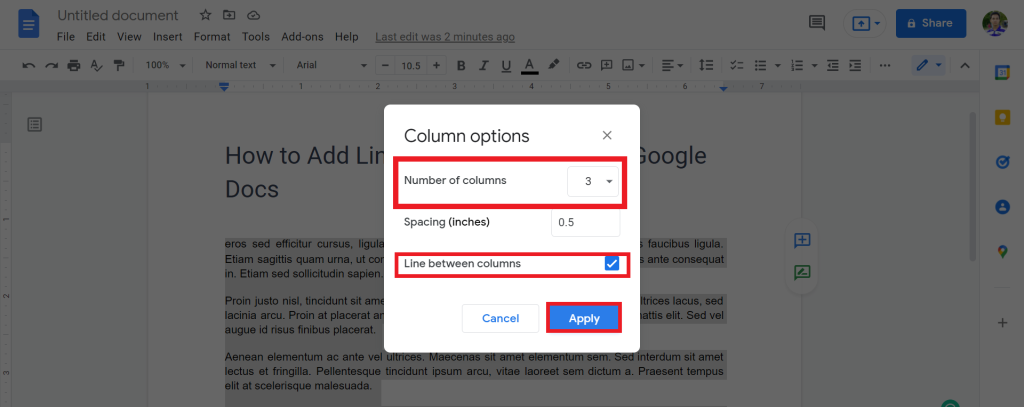
3. Now, select how many columns you need. You maximum select three columns. And make sure you select the Line between columns option. Then tap on the Apply option.

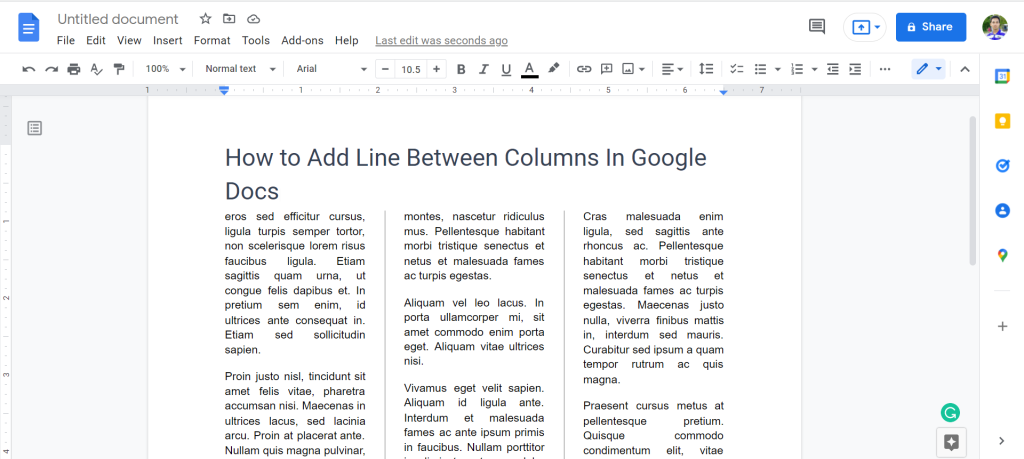
4. And you will successfully add lines between columns in google docs.

Check out How To Insert Vertical Line In Google Docs.
Final Thoughts
Now you know how to add lines between columns in google docs. So I hope you will not face any issue regarding this matter from now.
You can share this article with your find and family so that they can solve their problem. Thanks for reading. Have a great day.


